Add Row
Add Element
cropper
update
Ultimate Home DIY
update
Add Element
  • Home
  • Categories
    • Home Hacks
    • Tool Tips
    • Green Living
    • Renovation
    • Fix It
    • Decor Dreams
    • Skill School
March 17.2025
4 Minutes Read

Unlocking Solutions: Resolving 8 Common Garage Door Problems

Wooden garage door with brick wall

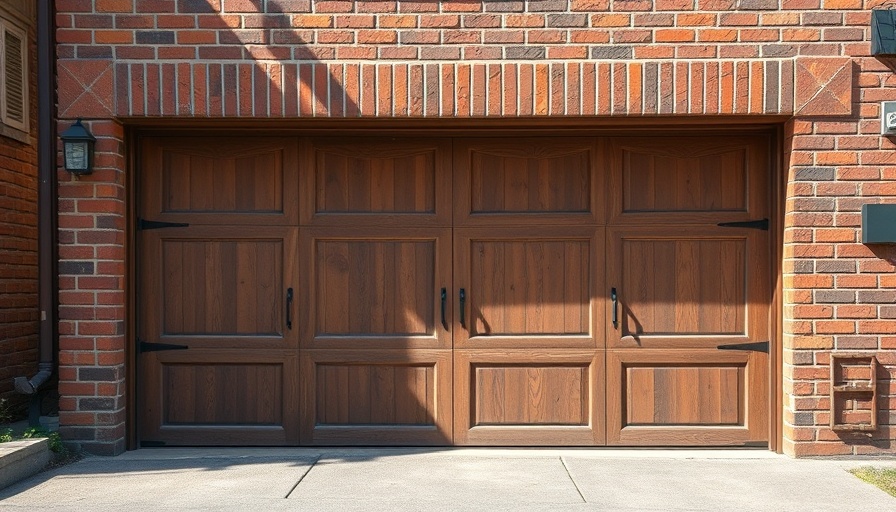
Understanding Common Garage Door Troubles: A Homeowner’s Guide

As a homeowner, encountering issues with your garage door can feel frustrating, especially when it interrupts your daily routine. From unexpected noises to doors that refuse to open or close, garage doors can pose several challenges. However, many of these common problems can be easily diagnosed and resolved with some basic knowledge and a few simple tools. In this guide, we’ll explore eight prevalent garage door issues and provide practical, DIY solutions to help you restore seamless functionality to your home.

1. The Garage Door Opener Remote Isn't Working

One of the most common hassles homeowners face is a non-responsive garage door opener remote. When you press the button and nothing happens, several factors could be at play. A depleted battery is often the culprit, but issues with wiring or a faulty keypad can also prevent your door from responding.

Ultimate Solution: Try changing the batteries first. If that doesn’t work, test your remote from different angles or distances. If it's still unresponsive, check the wiring connections as detailed in your user manual. Ensuring that everything is functioning correctly helps you avoid unnecessary repairs.

2. Noisy Garage Door Operations

Loud creaking or grinding noises can be both annoying and indicative of underlying issues with your garage door. This noise typically results from a need for lubrication, loose components, or worn-out parts.

Ultimate Solution: First, start by lubricating all moving parts, including rollers, hinges, and the opener mechanism, with a silicone-based lubricant to minimize noise. Tightening any loose bolts is crucial, too. If the noise persists, consider consulting a professional about possible parts replacement.

3. Doors That Refuse to Move

When your garage door simply won’t budge, it can feel like a major inconvenience. Occasionally, this could be a sign of misaligned or obstructed tracks, or issues with the sensors at the base of the door.

Ultimate Solution: Begin with checking the tracks for debris. Clear out any obstructions and ensure that nothing is obstructing sensor performance. An inspection of wiring connections and recalibrating the sensors can often resolve these problems without the need for drastic measures.

4. Uneven Opening or Closing

If your garage door opens or closes unevenly, it could be a result of broken springs or misaligned components. This not only makes for an inconvenient experience but can also pose safety risks.

Ultimate Solution: Inspect the tension on your garage door’s springs and ensure they are balanced. However, be cautious: if you notice a broken cable or spring, it’s usually best to call in a professional.

5. Garage Door Reverses Before Closing

If your garage door starts to close and then suddenly reverses, it's likely due to malfunctioning sensors or issues with the door’s track.

Ultimate Solution: Check for dirt or debris obstructing the sensor lenses or the operating tracks and clean them thoroughly. Additionally, adjusting the close-force settings as per your garage door manual might help. This adjustment helps reduce unnecessary reversals due to perceived obstruction.

6. Visual Inspection of Cables and Tracks

Regular monitoring of cables and tracks can prevent larger issues down the line. It's essential to ensure that these components are in good condition, as they are critical to operation.

Ultimate Solution: Look for any visible damage like fraying cables or warped tracks. Addressing these issues proactively not only enhances safety but also helps maintain the integrity of your entire garage door system.

7. Emergency Release Not Working

The emergency release feature allows you to manually operate the garage door during power outages. However, if this component is malfunctioning, it can hinder your access.

Ultimate Solution: Test your emergency release system periodically to ensure it works seamlessly in case of an emergency. Maintaining this feature can save you frustrations in critical situations.

8. Professional Help: When to Call the Experts

While this guide covers many common issues that can be resolved through DIY solutions, some situations are best left to experienced professionals. For instance, dealing with high-tension springs or significant electrical malfunctions requires specialized knowledge and tools.

Ultimate Solution: Always err on the side of caution. If you encounter persistent problems or feel uneasy about handling repairs, seek assistance from a qualified technician.

Taking Charge of Your Garage Door Maintenance

Understanding these common garage door problems and their solutions empowers homeowners to take a proactive approach to maintenance. With a bit of attention and care, you can ensure your garage door remains a reliable aspect of your home’s security and convenience.

Having the knowledge to diagnose and resolve problems not only saves you time and money but can also provide peace of mind in knowing you can tackle these challenges head-on.

To stay updated on the latest DIY tips and home maintenance advice, subscribe to our newsletter or join our community forum for discussions and assistance from fellow homeowners!

Skill School

4 Views

0 Comments

Write A Comment

*
*
Related Posts All Posts
01.09.2026

DIY Guide: How to Build a Shower Base for Your Walk-in Shower?

Update Transforming Your Bathroom: Building a Walk-in Shower Base Are you dreaming about a stylish and spacious walk-in shower? With the right planning and tools, this DIY project can become a rewarding addition to your home. Walk-in showers are not just about aesthetics; they offer a practical solution to modern living by providing ease of access while enhancing your bathroom’s appeal. Essential Tools and Materials Before you begin the journey of constructing your shower base, gathering all necessary tools and materials is crucial. Here’s what you’ll need: Shower tray (preferably sloping) Shower drain Optional curb Waterproof materials Thin-set mortar Sealant Adhesives Shower kit (including a shower head, faucet, and arm) Circular saw, drill, and other DIY tools for cutting and assembling Measuring tape and level for precise measurements Choosing the right shower kit is a key step in this process. Kits vary significantly; renowned options like KBRS and Fundo Lingo offer diverse accessories and compatibility with various shower designs. Step-by-Step Guide to Installation Building a shower base for your walk-in shower can be accomplished with some diligence. Follow these essential steps: 1. Assess the Shower Floor Start by examining your shower floor. It needs to be flat and devoid of any bumps. If inconsistencies are present, consider leveling them out before you proceed. 2. Create the Shower Base Cut your shower tray to the desired size, ensuring it fits snugly in your space. Applying an even layer of thin-set mortar to the subfloor is necessary; this helps bond the shower tray to the floor securely. Don’t forget to clean the subfloor before applying the thin set to avoid any debris disrupting the bond. 3. Finalize the Drain Installation Apply sealant around the drain and let it dry. Insert the drain through its hole and ensure a watertight finish by properly sealing all connections. A strong waterproofing layer is essential to prevent any leakage. 4. Add the Curb and Waterproofing After you’ve set the tray, consider installing curbs to enhance safety by reducing slip risks. Lastly, apply liquid waterproofing to all surfaces to complete the waterproof barrier. Make sure to follow the manufacturer’s instructions for the best results. Common Myths Debunked Many people may believe that constructing a walk-in shower base is a complex task that requires professional help. However, with the right guidance, tools, and a bit of patience, any homeowner can achieve this upgrade. Key factors include: Understanding the layout and design considerations for effective waterproofing. Recognizing that DIY projects don’t have to be overwhelming—take it step-by-step! Future Considerations As you undertake this project, think about long-term upkeep and maintenance. Materials that are durable and easy to clean can extend the lifespan and look of your shower. Choosing well-designed fixtures will not only improve functionality but also enhance the aesthetic appeal of your bathroom. Embracing the Spirit of DIY Building a shower base for your walk-in shower is not just a task; it’s a chance to personalize your living space. With a little investment in your time and resources, you can achieve a project that reflects your style and meets your functional needs. Consider gathering a couple of friends to share the experience! Transforming your bathroom can be a memorable event to bond over. Take the first step towards your shower renovation! Gather your materials and start planning your project today. If you want even more tips and details, feel free to explore our comprehensive guides on home improvement and decorating.

11.23.2025

6 Smart Strategies for Buyers: Consider Before Purchasing a Shed Kit

Update Understanding Your Shed's PurposeBefore diving into purchasing a shed kit, it's essential to clarify what you plan to use it for. Will it serve as a storage space for tools, a workshop for hobbies, or even a retreat for relaxation? Defining the shed's purpose helps tailor its design features — such as ventilation, shelving, and electricity accessibility — thus avoiding future inconveniences.Budgeting for Your ShedYour budget plays a crucial role in selecting the right shed kit. Shed prices vary significantly based on size, materials, and additional features. While a lower-priced kit might seem appealing, hidden costs for essential components (like flooring) can add up later. Consider investing a little extra upfront to ensure durability and functionality.Choosing the Right Size: Less is More?When it comes to size, bigger isn't always better. Consider the space you have available, local regulations, and your actual storage needs. A well-planned smaller shed can often serve the same purpose effectively, leaving you with more yard space for other activities or landscaping.The Importance of Building PermitsMany homeowners overlook the necessary permits required for constructing a shed. Even small backyard structures often require approval, especially if they exceed specific dimensions or are close to property lines. Failing to check zoning requirements can lead to fines or even removal orders, making it essential to consult local regulations before starting.Assistance with Assembly: DIY or Professional Help?Not all shed kits come with easy assembly instructions. If you're unfamiliar with power tools or construction basics, consider hiring a professional for installation. Those with DIY skills can save money by assembling kits themselves, but ensuring that the process is manageable is key.Exploring Materials: Durability Versus CostThe materials used in your shed can significantly affect its performance and longevity. While wooden sheds may offer aesthetic appeal, metal or plastic options can provide better resistance against weather and pests. Understanding the pros and cons of available materials ensures you choose wisely based on your specific climate and maintenance preferences.Future-Proofing: Planning for ExpansionIn the excitement of choosing the perfect shed, many overlook future needs. As your circumstances change, so might your storage requirements. It's wise to select a size and layout allowing for easy add-ons or expansion in the future, thus minimizing overall costs.Put thought into each of these components before making your purchasing decision. Ultimately, a shed can be a valuable addition to your property, but only if chosen wisely. By considering your purpose, budget, size requirements, necessary permits, assembly options, and material durability, you can make a well-informed decision that serves you for years to come.

11.19.2025

Is Your Driveway Showing Signs of Wear? Learn When to Replace It

Update The Lifespan of Your Driveway: Understanding the Signs A driveway is more than just a functional space; it plays a crucial role in enhancing your home's curb appeal and maintaining property value. In Michigan, harsh weather conditions, combined with wear from heavy vehicles, can significantly impact your driveway's condition over time. Key indicators exist to help homeowners discern whether repairs are sufficient or if a complete replacement is necessary. Spotting Cracks: When Small Problems Become Big Ones Small hairline cracks can be a normal part of concrete curing; however, persistent or widening cracks often signal deeper structural issues. These issues arise from soil movement, freeze-thaw cycles, or improper drainage pathways. Homeowners should be alert for cracks that keep reappearing even after repairs. An experienced concrete contractor can make a thorough assessment, determining whether resurfacing can resolve the issue or if replacement is the safer option. Drainage Issues: Why Puddles Matter Observing persistent puddles on your driveway after rainfall is not just an aesthetic concern; it could lead to significant problems, including foundation damage and soil erosion. A well-installed driveway should slope away from your home to redirect water. If pooling occurs frequently, it may indicate that your driveway has settled unevenly over time. In this case, consulting a professional can provide options for re-grading or repair, which also helps enhance the longevity of your driveway. Dealing with Spalling: What You Should Know Winter in Michigan is notoriously tough on concrete driveways. If you notice flaking, peeling, or spalling of the surface, repairs might only be a temporary fix if the damage has penetrated beneath the surface. This condition arises due to exposure to de-icing salts and rapid temperature fluctuations. Switching to air-entrained, high-strength concrete during a replacement can significantly mitigate future weather-related issues while extending the lifespan of your driveway. The Importance of Addressing Uneven Sections Driveways that sink or present uneven surfaces pose safety hazards, creating tripping risks. While localized leveling (mudjacking) might work for small patches, widespread sinking often indicates base failure, suggesting a complete replacement to secure safety and durability in the long run. Proper inspection for these underlying issues by a knowledgeable contractor is essential for maintaining your driveway's integrity. Enhancing Curb Appeal: When to Consider a Replacement Even if your driveway remains structurally sound, signs of fading, staining, or cracking can detract from your home's appeal. Opting for a modern design, such as stamped or colored concrete, can boost your property’s value. Aesthetic improvements not only update your home’s look but also provide a fresh foundation for enjoyable gatherings and family activities. Conclusion: Taking Action on Your Driveway’s Condition Replacing or repairing your driveway can be an overwhelming task, but recognizing the signs early can save you money in the long run. It’s vital to consult with qualified contractors in Michigan who understand the unique challenges posed by the state’s weather. These professionals can assess the extent of damage and recommend the best steps forward for your driveway. Don’t wait for problems to become severe—schedule an inspection today to ensure your driveway remains functional and attractive.

Terms of Service

Privacy Policy

Core Modal Title

Sorry, no results found

You Might Find These Articles Interesting

T
Please Check Your Email
We Will Be Following Up Shortly
*
*
*