Add Row
Add Element
cropper
update
Ultimate Home DIY
update
Add Element
  • Home
  • Categories
    • Home Hacks
    • Tool Tips
    • Green Living
    • Renovation
    • Fix It
    • Decor Dreams
    • Skill School
August 06.2025
3 Minutes Read

Transform Your Space: 8 Essential Small Appliance Storage Ideas

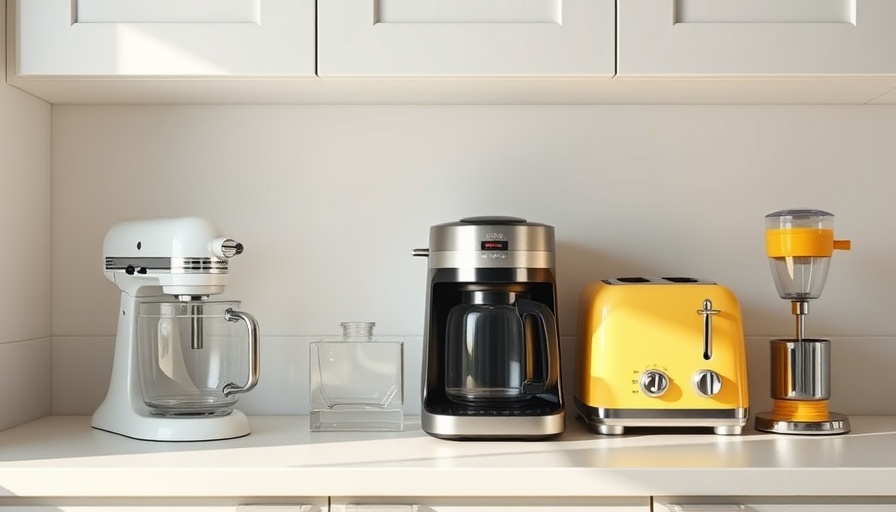
Small Appliance Storage Ideas in a modern kitchen with various small appliances.

Effective Small Appliance Storage Ideas to Organize Your Kitchen

Are you tired of the clutter that comes with your beloved small kitchen appliances? From coffee makers to blenders, these tools make everyday tasks easier but can take up precious counter space. Fortunately, there are plenty of effective storage solutions out there that can help you reclaim your kitchen, making it look neat and organized.

Understanding the Importance of Storage and Convenience

When considering how to store your small appliances, it's essential to keep in mind two critical factors: concealment and convenience. As the organization expert Melanie Summers suggests, the goal is to store appliances where they are most frequently used. For instance, placing your coffee maker close to your mugs or having a designated space for the toaster can streamline your morning routine and avoid unnecessary mess.

1. Appliance Garages: The Ultimate Solution for Clutter

One of the most popular solutions for managing small appliances is the appliance garage. As seen on various home design platforms, these functional cabinets allow appliances to slide in and out easily, keeping them concealed when not in use. With options like pocket doors, roll-up, or flip-up designs, an appliance garage integrates seamlessly into your kitchen layout.

2. Designating Cabinets: Simplifying Storage Efforts

If your kitchen lacks the space for an appliance garage, consider designating a lower cabinet as an appliance storage area. This straightforward solution, showcased by interior designers on social media, keeps your appliances all in one place without the need for extensive renovations. It’s a practical example for homeowners looking for a budget-friendly fix.

3. Kitchen Carts: Versatile and Stylish

A kitchen cart is an excellent addition for those with limited storage. Not only do these versatile pieces of furniture hold your small appliances but they can also double as serving stations. Many kitchen carts feature wheels, making them easy to move around, which is particularly advantageous for renters or anyone looking to avoid permanent installations.

4. Organizing Small Accessories: Maximizing Every Space

When storing appliances, don’t forget about their accessories! The last thing you want is to misplace crucial parts like blender attachments. Incorporating clear acrylic bins to categorize these smaller items can help optimize your cabinet space, ensuring every inch counts.

5. Hidden Storage Solutions: Create a Calm Environment

For a truly minimalistic approach, consider integrating hidden storage solutions such as pull-out shelves or custom cabinetry. These options can cleverly conceal appliances while keeping your kitchen looking tidy and chic. Homeowners should work with designers or kitchen planners to create tailored solutions that meet their unique needs.

Incorporating Smart Technology: Embracing the Future of Kitchens

Today’s kitchens are evolving, and technology plays a vital role in this transformation. Consider investing in smart appliances that can be controlled remotely while staying tucked away. This tech-savvy approach enhances convenience while also emphasizing organization.

Future Trends: Sustainable Storage Solutions

As we look to the future, sustainable living is becoming increasingly important. Try incorporating eco-friendly materials in your storage solutions, such as bamboo organizers or recycled materials in cabinetry. This not only benefits the environment but also adds a unique touch to your kitchen design.

Practical Insights: Steps to Take Today

Ready to organize your kitchen? Start by evaluating your current appliance collection. Identify which items you use most frequently and assign them the most accessible spots. From there, work on decluttering unused appliances and consider investing in smart storage solutions—such as those discussed above. The goal is not just to create space but to foster a kitchen environment that is functional and enjoyable to use.

Transforming Your Kitchen: Final Thoughts

With just a few thoughtful strategies, you can significantly enhance the functionality and appearance of your kitchen. The combination of practicality and aesthetics is essential, and by implementing some of these storage ideas, you can create a space that brings joy to cooking and entertaining. Embrace these changes, and get your kitchen organized today!

Call to Action: Take the first step towards a clutter-free kitchen by evaluating your small appliance storage today. Implement at least one of the suggested solutions and experience the difference it can make! Every small step counts toward creating a more organized and efficient home.

Home Hacks

3 Views

0 Comments

Write A Comment

*
*
Related Posts All Posts
11.06.2025

Discover Why the Drew Barrymore Chair is a Must-Have for Every Home

Update The Drew Barrymore Chair: Beyond a Viral SensationThe Drew Barrymore Chair by Walmart has quickly become a beloved piece in countless homes, thanks to its blend of comfort, style, and affordability. For homeowners seeking a cozy addition to their reading nook or lounge area, this chair is proving to be a worthwhile investment. As someone who has enjoyed this chair for over a year, I can attest to its enduring appeal and excellent functionality.Why This Chair Stands OutDesigned with a mid-century inspiration, the Drew Barrymore Chair stands out not just for its aesthetic but also for its practical features. With a barrel shape and a sturdy swivel base, it has a unique design that's sought after by many. Available in multiple colorways including sage, charcoal, and rose, it easily complements various home decors, allowing for personal expression in any space.What makes this chair especially appealing is its price point—at just $298, it offers a luxurious feel reminiscent of chairs that typically cost much more. Reviewers have praised it for being not only visually stunning but also plush and supportive, striking a balance between style and function.A Testament to Comfort and VersatilityWhen I first received my sage-colored chair, I was impressed by its easy assembly. Each section was well-protected during shipping, and I had it up and ready in under 30 minutes, even without the instruction manual. The chair has a generous size that allows me to sit comfortably and cross my legs, which is often a challenge with smaller chairs. It has become my go-to spot for reading, lounging, and even working from home.Similar sentiments are echoed by many users who find the oversized seat spacious enough for pets and loved ones to join in. This is particularly important for those looking to create a welcoming atmosphere. The chair’s design promotes relaxation, making it a perfect addition to any reading nook or living space.Quality and Longevity: A Year LaterAfter a year of use, I can confidently say that the chair has held up remarkably well. Its boucle fabric is not only stylish but also durable, providing comfort without compromising on resilience. Despite the occasional pet claw or spill, the chair continues to look as good as new—a testament to its quality materials and craftsmanship.While some reviewers have noted that the back may lack full neck support for taller users, many have found solutions, such as added cushions that can enhance comfort. This highlights an important point: when investing in furniture, personal adjustments can often tailor a piece to fit individual needs, making the most of your purchase.Why You Should Consider the Drew Barrymore ChairWith over 11,000 ratings and an average of nearly five stars, it’s clear the Drew Barrymore chair resonates with many users. It blends luxury comfort with practical beauty, holding strong against other high-end options available on the market. Whether you want a place to curl up with a good book, enjoy your favorite show, or simply have a stylish accent piece, this chair offers versatility and comfort.As someone who values both aesthetics and functionality in home decor, I can wholeheartedly recommend adding this chair to your collection. It's not just furniture; it’s a cozy inviting spot that will enhance your home’s atmosphere and invite you to relax in style.How to Make The Most of Your Drew Barrymore ChairFor those considering purchasing this chair, here are a few tips to maximize your enjoyment:Add some accessories: Enhance comfort with throw pillows or a warm blanket, which can turn your chair into the ultimate relaxation zone.Choose the right color: Select a color that complements your existing decor and personal style. The range of options makes it easy to find the perfect match.Arrange your space: Create a cozy reading nook by placing a small side table or lamp next to your chair for an inviting atmosphere.In conclusion, the Drew Barrymore Chair is more than just a trend; it's a reliable addition to any home. Its stylish design, comfort, and versatility make it a worthwhile investment for creating a comforting and aesthetically appealing space. Whether you're reading, relaxing, or working, this chair is sure to become a beloved staple in your home. Don't miss out on experiencing its charm for yourself—consider adding the Drew Barrymore chair to your living space today!

11.04.2025

12 Days of Holiday Tips: Your Guide to Stress-Free Celebrations

Update Embrace the Holidays: A Guide to Stress-Free Season As the holiday season approaches, the joy of togetherness that it brings can often be overshadowed by stress and preparation. To help homeowners navigate this busy time, we present these 12 Days of Holiday Tips that emphasize creating a warm atmosphere while minimizing chaotic stressors. This guide aims to transform the season into a celebration of connection and creativity, steering your energy towards bonding with family and friends rather than feeling overwhelmed. DIY Your Gifts and Decorations Early While store-bought decorations are readily available, there's unmatched value in personalizing your environment. Creating your own holiday decorations, such as stained glass ornaments or homemade gift bows, adds a unique warmth that cannot be duplicated by store items. Engage your family in DIY projects to bring everyone together, tapping into creativity that will make your home shine with love and laughter. Plan Your Cleaning Ahead of Time With more visitors comes more mess. Instead of waiting until the last minute, take a proactive approach to your holiday cleaning. Schedule specific days dedicated to decluttering, and engage family members to share in the responsibility. Pre-planning this task will mitigate the distraction and stress, allowing you to fully immerse yourself in family gatherings without being sidetracked by chaos. Smart Strategies to Reduce Holiday Costs Amidst the joy of reunions and celebrations, financial stress can creep in unnoticed. Learn how to manage your energy expenses, especially when hosting guests. Lowering your thermostat while still ensuring everyone is comfortable can prevent shocking energy bills. Explore alternative heating solutions or invest in energy-efficient decorations to save money without sacrificing festivity. Choosing the Right Tree for Your Space The traditional Christmas tree may not suit all homes, especially for those with limited space. Consider alternatives that fit your decor and lifestyle. From compact potted trees to creative DIY tree designs made from materials at home, explore options that maintain the spirit of the season without the hassle of shedding pine needles. Make Your Own Holiday Decor Creating decorations doesn’t have to drain your wallet. Use household items to craft festive window clings or a serving tray that adds flair to your gatherings. Sometimes, the simplest ideas can yield the most stunning results, adding personal touches to your holiday setup that guests will remember. Protect Your Surfaces While Decorating During the hustle of decorating, ensure that your home stays protected. Utilize temporary hooks for hanging decorations to avoid damaging walls, ceilings, or floors. By planning how your decor is applied, you bond a sense of joy in beautifying your space while maintaining the home’s integrity. Prepare for Your Guests' Arrival Hosting often means accommodating more guests. If your dining setup is stretched, consider DIY folding tables that match your home decor. They are ideal for creating extra dining space and can be stored easily when not in use. This thoughtful addition ensures every guest feels welcome and included at your events. Ensuring Child Safety with Holiday Decor When it comes to decoration, safety for little ones cannot be overlooked. Follow tips for safely securing ornaments or hiding hazardous items while keeping the season merry for children. Adjust your decorations in ways that allow exploration and interaction without compromising their safety. Prioritize Fun and Family Time Amid all the preparations, don’t lose sight of the joy that holidays bring. Fun activities, like hiding an Elf on the Shelf or creating seasonal games, can deepen familial bonds and engender laughter, making your gatherings truly memorable. Preparing for Next Year Once the holiday season winds down, be sure to pack away decorations properly to make next year’s setup smoother. Investing time in organization will save you from holiday chaos in the future and help recharge your festivities each season. Conclusion: The Holiday Spirit of Connection This holiday season, channel your efforts into creating cherished memories with your loved ones, armed with practical tips that facilitate joy over stress. As Lily Thompson encourages, focusing on creativity, safety, and meaningful experiences fosters an environment where laughter and love flourish. So embrace these strategies and create precious moments that last a lifetime.

11.01.2025

Create Charming Holiday Spirit with DIY Window Clings

Update Unleash Your Creativity: The Joy of DIY Window Clings The holiday season is the perfect time to express your creativity, spread festive cheer, and save money, all while transforming your home with some dazzling DIY window clings. These homemade decorations not only bring a splash of color to your windows but also envelop your space in a warm, inviting atmosphere that resonates with the joy of the season. What You Need: Gather Your Supplies Creating your own holiday window clings is a budget-friendly project likely costing between $5 to $10. To get started, make sure you have: Clear plastic sheet protectors or translucent/wax paper Dish soap Food coloring or acrylic paint Glitter (optional for sparkle) Puff paint (for a 3D effect) White school glue A sheet of paper for your design This list shows just how accessible this creative endeavor is, as most items can be found easily around your home or at any local craft store. Step-by-Step Guide: Crafting Window Clings To create the perfect DIY window clings, follow these straightforward steps: Step 1: Create Your Design and Template Select a simple design you want to bring to life. This could be anything from snowflakes and reindeer to holly leaves. Draw it on a sheet of paper or print one from the internet. Place this design inside a plastic sheet protector, or if you’re using wax paper, tape it securely. Step 2: Mix Your Paint If you opt for the glue method, mix 1 tablespoon of glue with dish soap, and then add your chosen food coloring. This concoction will ensure a vibrant color while maintaining the cling-effect. Start with lighter shades and gradually add more color for depth. Step 3: Paint Your Design Using your paint or puff paint, carefully outline your design, ensuring the exterior lines are solid for ease of peeling later. Once outlines are complete, fill in shapes with thicker paint, allowing colors to connect without gaps to avoid cracking. Step 4: Let It Dry Patience is key – give your creation 24 to 48 hours to dry. It’s ready when it turns translucent. This drying time allows the paint to set properly, ensuring your clings don’t fall apart when you’re ready to display them. Step 5: Peel and Stick Once dry, carefully peel your cling from the sheet. If it’s resistant, a quick timeout in the freezer can do the trick! Press the smooth side onto clean windows—preferably in well-lit areas to showcase your handiwork. Transforming Your Space: The Impact of Window Clings Aside from being a fun activity, DIY window clings significantly elevate the atmosphere of your home. As expert holiday decor creator Richie David asserts, capturing natural patterns through simple designs makes it easy to beautify your space without overwhelming décor. Imagine replacing these clings with the seasons or holidays! Each new design can bring a fresh perspective, making your home feel lively and engaging. Why DIY? The Benefits of Homemade Decorations Cost-effective: Creating your own decorations is far cheaper than purchasing store-bought items. Personal touch: Crafting your own designs allows customization to suit your home’s decor. Bonding activity: This is an excellent project to enjoy with family, sparking creativity and cooperation. Moreover, there’s a satisfying joy that comes from seeing the results of your handiwork on display, creating a cherished memory each time you pass by a beautifully adorned window. Common Questions About DIY Window Clings Many aspiring DIYers have similar queries. For instance, will homemade window clings damage the glass? Not at all! They are safe for most surfaces and provide the bonus of peeling off without residue, though some light cleaning might be necessary afterward. The best part is that you can reuse them by simply storing them on their plastic sheets, allowing you to recreate the holiday magic each year. Call to Action: Start Crafting Today! With a wealth of benefits— budget-friendly, simple, and creative—why not embark on your DIY window cling adventure today? Gather your materials, let your imagination run wild, and transform your home one colorful cling at a time!

Terms of Service

Privacy Policy

Core Modal Title

Sorry, no results found

You Might Find These Articles Interesting

T
Please Check Your Email
We Will Be Following Up Shortly
*
*
*