Add Row
Add Element
cropper
update
Ultimate Home DIY
update
Add Element
  • Home
  • Categories
    • Home Hacks
    • Tool Tips
    • Green Living
    • Renovation
    • Fix It
    • Decor Dreams
    • Skill School
May 31.2025
3 Minutes Read

Master the Foolproof Method for Harvesting Rhubarb and Reap Rewards

Lush rhubarb plant in garden bed ready for harvest.

A Gardener's Delight: The Simple Joy of Harvesting Rhubarb

Rhubarb is unique in that it combines utility with beauty, showcasing large leaves and vibrant stalks that can enhance any garden. Once planted, this perennial plant can yield a rich harvest for over a decade, making it a popular choice for homeowners passionate about gardening. From sweet pies to tart sauces, rhubarb's versatility in the kitchen is as impressive as its aesthetic appeal. But how exactly do you harvest rhubarb to ensure it thrives year after year? With proper care and harvesting techniques, you can enjoy this delightful plant.

Understanding the Harvesting Timeline

Knowing when to harvest rhubarb is crucial for both the plant's well-being and the quality of what you gather. Experts such as agricultural specialist Laura Irish-Hanson from the University of Minnesota Extension emphasize patience when it comes to harvesting this unique vegetable. "If you planted your rhubarb within the last two years, hold off on harvesting until it reaches its third year," she advises. This timeframe allows the rhubarb to establish its root system and store energy, making for a healthier harvest in the long run.

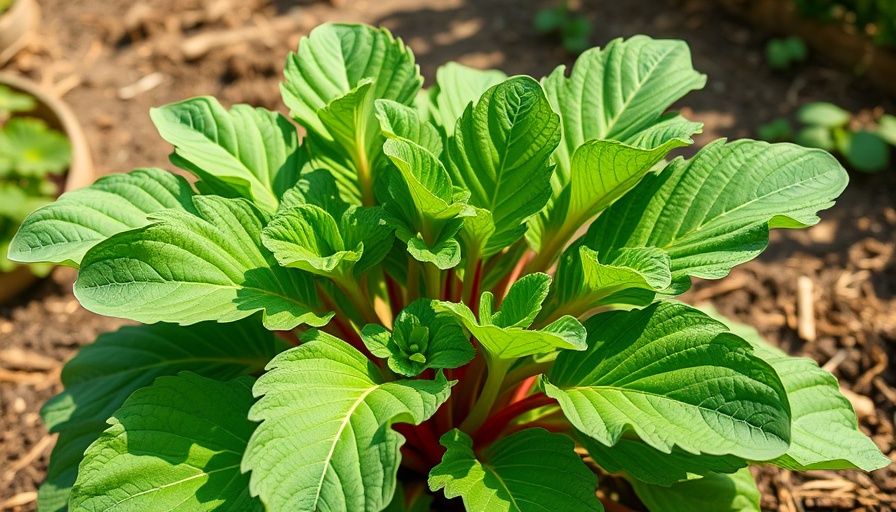
In the third year, you’ll know it's time to pick the stalks when the leaves reach their full size, roughly 18 to 24 inches wide. While the color and length can vary between varieties—ranging from deep red to speckled green—the most crucial indicator is firmness. Always opt for stalks that are solid and healthy.

The Art of Harvesting Rhubarb the Right Way

For best practices, never use tools like knives or pruners to harvest rhubarb; instead, employ your hands. Laura recommends gripping the stalk near its base and twisting it gently to detach it from the crown. This method minimizes damage and avoids leaving an open wound that could invite pests or disease. After pulling the stalk, cut off the leaf immediately as it contains toxic compounds. The discarded leaves can safely go into compost, enriching your soil in the future.

It’s also essential to leave approximately 50% of your rhubarb plant undisturbed each season. This ensures that it remains healthy and capable of producing again next year. Harvesting too much can lead to weak plants that struggle to thrive.

Common Mistakes and Helpful Tips

To get the most out of your rhubarb harvest, it's vital to be aware of common pitfalls. First and foremost, don't harvest in the summer months. The growing season makes the stalks tougher, leading to less desirable texture and flavor. Sticking to spring for harvesting will ensure you gather the sweetest produce.

Furthermore, maintain consistency in fertilization. Rhubarb is a heavy feeder and requires nutrient support to grow robustly. Regularly add compost or well-balanced fertilizer to keep the soil nutrient-rich and promote healthy growth.

Rhubarb: A Plant with a Purpose

The decision to grow and harvest rhubarb goes beyond as an endeavor in gardening; it's about fostering a lifestyle connected with nature. Homeowners passionate about sustainable living can harness rhubarb’s benefits by making their gardens eco-friendly and productive. By following correct harvesting techniques, you not only reap the benefits of delicious harvests but also contribute positively to your garden's ecosystem.

Embracing the Rhubarb Craze in Your Home

As you consider adding rhubarb to your garden, think about its various culinary uses. Whether in pies, jams, or savory dishes, rhubarb charm extends well past the garden gate. Each harvest offers an opportunity for healthy meals and memorable moments with friends and family around the table.

Given its ease in maintenance and rich rewards, rhubarb is indeed a symbol of sustainability and healthy living. By nurturing this plant and mastering the art of harvesting, you'll not only enhance your garden's beauty but also enrich your lifestyle.

Join the Rhubarb Harvest Movement!

Don’t just read about the joy of rhubarb; start your own harvest journey today. Remember, your actions in growing and picking this fantastic plant can lead to delicious dishes and long-lasting satisfaction. So, grab some seeds or established plants, get your hands dirty, and dive into the joy of home gardening!

Home Hacks

8 Views

0 Comments

Write A Comment

*
*
Related Posts All Posts
12.12.2025

Discover Why the Saatva Graphite Mattress Topper Is Essential for Your Home

Update Unveiling the Top Bedding Solution: Saatva Graphite Mattress TopperFor homeowners struggling with themed sleep discomfort or chronic back pain, the search for a budget-friendly upgrade can feel overwhelming. Yet, a revelation has come forth in mattress technology: the Saatva Graphite Memory Foam Mattress Topper. Having topped the charts as the best bedding item of 2025 in various reviews, including those from renowned sources like Family Handyman and Forbes, this innovative topper not only adds luxurious comfort but also significantly alleviates pain.A Sleep Game-Changer for All Types of SleepersMary Hen, a dedicated tester and reviewer, documented her struggles with back pain exacerbated by her firm mattress after childbirth. Upon integrating the Saatva Graphite topper into her sleeping arrangement, she witnessed a transformative experience that could resonate with many. The three-inch plush memory foam incorporated with cooling graphite technology not only aids in regulating temperature but contours to the body, providing targeted pressure relief that eases tension in critical areas.The Saatva topper’s design is meant to breathe life into older mattresses without the hefty price tag of a new bed. For homeowners hesitant about making a significant financial investment, this provides a compelling reason to consider the addition of a quality topper as an interim solution while maintaining comfort.How Mattresses Influence Sleep QualityUnderstanding the impact of mattress quality on sleep health is essential. The right mattress—or topper—can drastically shift sleeper experiences from discomfort to restful sleep. As noted in reference articles from both Family Handyman and Forbes, an inadequate sleep surface not only results in poor sleep but can intensify existing pain conditions. This is particularly prevalent in back pain cases, which can be aggravated by unsupportive surfaces. Thus, the Saatva Graphite Topper is designed to mitigate these issues, supporting spinal alignment while providing the plush surface needed for a soothing night’s sleep.Backing Evidence: Leading-Edge Testing and ExperienceWhat solidifies the Saatva topper's position at the forefront of bedding essentials are the rigorous tests it has undergone. Experts from both Family Handyman and Forbes highlight its adaptability to various body types and sleep styles, confirming its reputation as a top choice for back pain alleviation. Additionally, its durable design withstands wear and tear, assuring longevity, making it an investment that pays back in comfort strides.Common Misunderstandings About Mattress Toppers“Are mattress toppers only for old mattresses?” may be a common misconception. The reality is that they can be a strategic enhancement regardless of mattress age, providing customized comfort levels and allowing homeowners to achieve their desired firmness. As referenced in the analysis provided by Forbes, a proper layer can correct imbalances caused by poor foundation. Therefore, the Saatva topper stands not just as a filler but as an essential layer that promotes healthy sleep.Practical Insights for Your Bedding ChoiceWhen considering the Saatva Graphite Mattress Topper, evaluate your personal sleep needs. Would you classify yourself as a back, side, or stomach sleeper? Identifying your sleep style can guide you in maximizing the effectiveness of this topper. Side sleepers, for instance, may find the pressure relief features particularly advantageous, whereas back and stomach sleepers can choose to target their specific alignment needs.Conclusion: Elevate Your Sleep TonightIf you find yourself waking up sore or groggy, the Saatva Graphite Memory Foam Mattress Topper may just be the solution you've been looking for. Invest in your comfort and overall health with this simple yet effective upgrade to your existing mattress. Don’t let sleep discomfort persist. Consider enhancing your nights with the Saatva topper and embrace a rewarding and revitalizing sleep experience.

12.11.2025

Craft a Unique Copper Pipe Coffee Maker for Holiday Cheer

Update Transform Your Coffee Experience with a DIY Copper Pipe Coffee Maker This holiday season, bring a touch of warmth and artistry into your kitchen with a DIY Copper Pipe Coffee Maker that not only brews delectable coffee but also stands as a testament to your DIY skills. Fusing the elegance of copper with the functionality of a pour-over coffee setup, this project is perfect for homeowners eager to add character to their spaces. Why Copper? Copper has long been revered for its aesthetic appeal and heat conductivity. When you think about the holidays, warmth and comfort come to mind – and what better way to embody that than with copper tools? The rich color and gleaming finish of your DIY coffee maker will enhance any kitchen's decor while allowing you to brew barista-quality coffee. Project Overview Undertaking this project requires less than $100 and a day of your time, making it feasible even for those with beginner DIY skills. As Emiko Franzen highlights, this project requires just a few hand tools and materials that can be found at your local hardware store. The components are straightforward: Pipe sections, fittings, and a borosilicate glass funnel. Essential tools like a drill, clamps, and a tubing cutter. A Step-by-Step Guide to Building Your Coffee Maker Whether you’re gearing up for family gatherings or looking to impress your friends, making this copper coffee maker not only fulfills your need for a great cup of coffee, but it's also an incredible conversation starter. Here, we break down the crafting process: Tools You’ll Need To complete your copper coffee maker, gather the following tools: Drill Corner clamping jigs Hammer Propane torch Metal file Materials List The success of your DIY coffee maker hinges on the proper materials. The primary components include: 1” dowel Various copper pipes and couplers Borosilicate glass funnel Dry Fitting and Gluing: Steps to Success Before diving into gluing, dry fit your pieces to ensure everything aligns beautifully. This step is crucial because adjustments are easier to make at this stage. Once satisfied, prepare your pipe ends and couplings by scuffing them lightly – this allows the adhesive to bond better. When gluing, take care to maintain the frame's integrity. Use a level to ensure it's up to par; this detail can enhance both functionality and aesthetics. Personal Touch: Making it Your Own The beauty of a DIY project lies in its adaptability. Consider personalizing your coffee maker by adding elements that connect with your style or functional needs. Perhaps, incorporating a shelf for coffee mugs or a built-in spot for coffee beans could elevate your creation even further. The Emotional Connection: Memories Made Around Coffee Coffee is more than just a beverage—it's a context for memory, conversation, and connection. As you brew your own coffee at home, think about the tradition of gathering with friends and family. This coffee maker will become a centerpiece of those cherished moments, holding the essence of holiday warmth and togetherness. Taking the First Step When you take on this project, you’re not only crafting a functional piece for your home, but you’re also engaging in a rewarding creative process. From the satisfaction of building it yourself to the joy of serving delicious coffee, this DIY endeavor can transform your holidays into special gatherings filled with warmth. So, gather your materials, roll up your sleeves, and dive into this charming DIY project! If you're inspired by the idea of creating your own DIY Copper Pipe Coffee Maker, don’t wait! Start gathering your materials today and add a unique touch to your home this holiday season.

12.10.2025

Winterize Your Motorcycle Properly: 6 Essential Steps for Protection

Update Protect Your Ride: Understanding the Importance of Winterizing Your Motorcycle As riding season draws to a close, it’s crucial for motorcycle enthusiasts to take steps to prepare their beloved bikes for the harsh winter months. Winterizing isn’t just an act of preservation; it’s an investment in your motorcycle’s longevity and performance quality. Cold temperatures, moisture, and the potential for corrosion can wreak havoc on unprotected machines, leading to costly repairs in the spring. Your Essential Guide to Winterizing a Motorcycle Winterizing your motorcycle may seem straightforward, but there are specific steps to ensure your bike remains in optimal condition until the weather warms up again. Here’s a deep dive into the process, incorporating insights from various motorcycle experts. Step 1: Start with a Thorough Cleaning Begin by giving your motorcycle a thorough wash. The remnants of road grime, dirt, and insects can cause paint damage and corrosion if left unattended. Use a motorcycle-specific cleaner mixed with water, and a microfiber towel to wipe down the entire bike. After washing, ensure it is completely dried and consider applying a wax to add an extra layer of protection to your paint. Step 2: Change the Oil and Fluids There’s nothing more damaging to your engine than dirty oil, which can contain contaminants that corrode internal moving parts. Prior to winter storage, change your oil and oil filter. Additionally, check other critical fluids such as brake fluid and coolant, topping them off as needed. This simple task mitigates the risk of engine damage when you hit the road again come spring. Step 3: Fuel Up and Stabilize Fill your gas tank with fresh, high-quality fuel before storage. Fuel stabilizers are essential: they help prevent fuel degradation which leads to complications in fuel injection systems as well as oxidation within the tank. Be sure to let the engine run for about 5-10 minutes after adding the stabilizer to circulate it throughout the system. Step 4: Battery Care Is Crucial Cold weather can severely drain motorcycle batteries. Connect a battery tender to keep it charged or, if not possible, remove the battery and store it in a climate-controlled area. Using a maintenance charger helps prolong the battery's life and ensures it's ready when you are. Step 5: Tire Maintenance Before winter hits, check the tire pressure and inflate them to the manufacturer’s specifications, as low pressure can lead to flat spots during storage. If possible, elevate the bike on stands to avoid contact with the ground for prolonged periods. Step 6: Cover Your Motorcycle Wisely When it comes to covering your bike, indoors is always preferred. A breathable cover will allow moisture to escape and prevent corrosion. Avoid using plastic covers as they can trap water inside, leading to damage. Common Misconceptions and Best Practices One prevalent myth is that periodically running your motorcycle throughout winter is beneficial. In reality, short idling sessions can cause condensation buildup and internal engine issues. It’s best to let the bike rest unless you plan full rides during warmer days. Future Predictions: The Importance of Preventive Care Regular maintenance before storing your motorcycle can significantly reduce repair bills in the spring and make your bike ready to ride sooner. Investing a few hours now can save you from extensive mechanical work down the line. As riding conditions become increasingly unpredictable due to climate change, being proactive in your motorcycle care will only enhance your riding experience. Conclusion: Take Action to Protect Your Motorcycle By following these steps, you’ll give your motorcycle the best chance of maintaining its integrity through winter months. Not only will you save time and money in the spring, but you’ll also indulge in the joy of riding without concerns about mechanical issues. Get your winter bike maintenance done now to enjoy a smooth riding experience when the roads are clear once more!

Terms of Service

Privacy Policy

Core Modal Title

Sorry, no results found

You Might Find These Articles Interesting

T
Please Check Your Email
We Will Be Following Up Shortly
*
*
*