Add Row
Add Element
cropper
update
Ultimate Home DIY
update
Add Element
  • Home
  • Categories
    • Home Hacks
    • Tool Tips
    • Green Living
    • Renovation
    • Fix It
    • Decor Dreams
    • Skill School
April 18.2025
3 Minutes Read

Unlocking the Mystery of USB Cables: Which Ones Are Right for You?

Assorted best USB cable types on pastel background

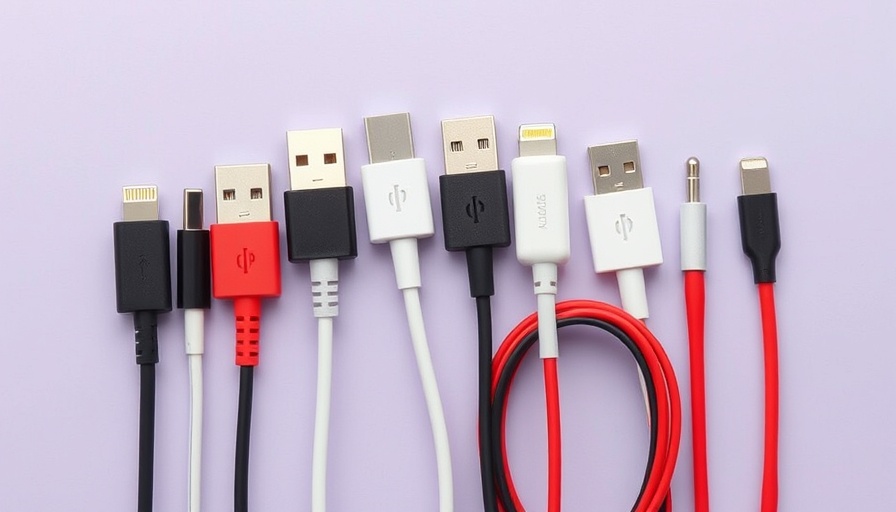
The Essential Guide to Understanding USB Cables

In today’s digital age, USB cables are integral to powering our devices and ensuring smooth data transfers. Yet, many homeowners and DIY enthusiasts remain puzzled by the various types available. From USB-A to USB-C, each has unique features and functionalities that cater to different devices and needs. Understanding these differences can not only simplify your life but enhance your tech experience.

Historical Context: The Evolution of USB Cables

USB technology has come a long way since its inception in the late 1990s. Originally designed to standardize connections among computers and peripherals, it has evolved significantly over the years. USB-A was the first widely adopted format, and despite its rectangular shape, it became the standard due to its versatility. However, as technology moved forward, the need for faster and more efficient connections led to the creation of various other types, including Micro-USB and USB-C.

Decisions You Can Make With This Information

Knowing the pros and cons of each USB cable type allows you to make informed purchasing decisions. For instance, if you are upgrading your tech, you might consider investing in USB-C cables, which support higher speeds and more functions compared to Micro-USB. This can be especially beneficial if you own devices that also support these faster protocols, potentially reducing the need for multiple types of cables.

Counterarguments and Diverse Perspectives

While USB-C is celebrated as the advanced choice for many users, not all devices are equipped to handle its capabilities. For example, if you own older electronics that only support USB-A or Micro-USB, transitioning to USB-C may not be practical. This highlights the importance of evaluating your specific needs, rather than simply following the latest trends in technology.

Unique Benefits of Knowing USB Cable Types

A clear understanding of USB cables can lead to a more organized living space, especially in a DIY environment where gadgets abound. Streamlining your cables not only enhances aesthetics but also improves functionality. By keeping only the necessary cables at hand, you can reduce clutter and make your workspace more efficient.

Practical Tips for Homeowners

When considering which USB cables to purchase, think about the following tips:

  • Assess Device Compatibility: Before buying new cables, check which type your devices require to avoid redundancy.
  • Go for Quality: Invest in reputable brands to ensure durability, especially for frequently used cables.
  • Label Your Cables: Keep your cables organized by labeling them according to their purpose or device type to save time.

Future Predictions: Where USB Technology is Heading

As technology continues to advance, the demand for faster, more versatile charging options will grow. USB-C is likely to dominate the future landscape due to its capacity to transmit both power and data at higher rates. Moreover, as more devices adopt this standard, it could lead to a more universal charger option, ultimately simplifying our tech lives.

In conclusion, having a grasp of USB cable types can greatly enhance your tech experience, helping you choose the right cables for your devices while tidying up your space. Consider evaluating your existing cords, and make informed choices moving forward.

If you're looking to further improve your home and tech setup, consider organizing your space with carefully selected tools and materials that complement your style and efficiency goals. Going beyond USB cables, think about sustainable living practices that support your overall well-being. It's time to embrace both organization and sustainability!

Home Hacks

3 Views

0 Comments

Write A Comment

*
*
Related Posts All Posts
07.18.2025

Are Car Night View Cameras Worth It? Explore Safety, Pros and Cons

Update Understanding Car Night View CamerasCar night vision cameras are becoming features of high-end vehicles, aimed at enhancing safety during low-light conditions. These technologies, such as the Night View Assist offered by Mercedes-Benz, utilize infrared beams to provide a clearer picture of the road when visibility is poor. They can detect pedestrians at a distance of up to 80 meters and highlight them on the driver's display, potentially preventing accidents at night. However, as with any technology, the significant question arising is whether they genuinely enhance vehicle safety or merely add complexity to an already tech-filled drive.Evaluating the Effectiveness of Night Vision CamerasWhile the prospect of a camera that helps see in the dark sounds promising, its practicality depends on various conditions. Research indicates that climate plays a crucial role. For instance, night vision cameras can struggle in inclement weather, such as rain, snow, or fog, which can obscure both the camera's view and its effectiveness. Furthermore, Kelley Blue Book has pointed out that while these cameras can identify living creatures and stationary hazards, they have limitations with inanimate objects that do not emit heat, like debris on the road. Therefore, understanding one’s driving environment becomes essential in determining whether such technology adds true value.The Car Brands Leading in Night Vision TechnologyLuxury brands are leading the way in the night vision camera market. Aside from Mercedes-Benz, manufacturers such as Toyota, BMW, Cadillac, and Lexus are integrating this technology into their premium models. However, for those who may not want to invest in a luxury vehicle, several aftermarket dash cameras can provide night vision capabilities, although they come with varying levels of effectiveness.The Cost-Value Relationship of Night Vision FeaturesInvesting in a car equipped with a night vision camera comes with questions around cost-effectiveness. According to industry feedback, these safety features may not provide sufficient benefits to justify their cost, depending on an individual’s budget and driving habits. While the intent behind such technologies is accident prevention, potential buyers must weigh these costs against actual safety gains. Will you drive more safely in the dark? This is a pivotal question that requires careful consideration.Personal Perspective: The Emotional Talk About Safety GadgetsSafety on the road transcends technology; it is also an emotional experience. The fear of unseen hazards often lurks in the minds of drivers at night. Night vision cameras can provide a semblance of reassurance, filling in the gaps of visibility that the human eye misses. Yet, as technology evolves, it's critical to engage with the tools we select consciously. Embracing safety technologies should not distract us from remaining vigilant and responsible behind the wheel.Conclusion: Navigating the Future of Auto Safety TechnologiesCar night view cameras present a tangible example of how technology endeavors to enhance our driving safety, especially in challenging conditions. However, as with any tool, their true effectiveness lies in how we utilize them. As we continue to navigate advancements in car safety, we must remain cautious of substituting technology for human judgment. So, if you're considering whether to invest in a night vision camera for your vehicle, take into account the conditions in which you drive and your budget to determine whether this feature fits your needs and if it makes your journey a little brighter.

07.17.2025

Mastering Vinyl Plank Flooring Repairs: Essential DIY Insights for Homeowners

Update Understanding Vinyl Plank Flooring: A Reliable Choice for Homeowners Vinyl plank flooring has emerged as a popular choice among homeowners for its durability and aesthetic appeal. Unlike traditional hardwood, vinyl planks are resistant to moisture, scratches, and staining, making them ideal for high-traffic areas. However, even the sturdiest flooring can encounter damage over time due to heavy furniture, pet claws, or everyday wear and tear. Knowing how to properly repair your flooring can save you time and money in the long run. Identifying Damage: The First Step in Repairing Vinyl Plank Flooring Before you can fix your vinyl planks, it's essential to identify the type of damage. Is it a scratch that only affects the surface, a gouge that penetrates deeper, or a completely detached plank? For minor scratches, a simple polish may suffice, but if you’re looking at more significant issues, you could need to replace the planks. Recognizing when to rely on repairs versus when to consider replacements is crucial in preserving the integrity of your floor. Repair Methods for Different Flooring Qualities As mentioned in the step-by-step guide, two primary methods exist: removing and replacing planks or modifying the existing structure. For those with high-quality, name-brand vinyl flooring, the first method is often recommended. This involves unclicking the damaged plank and installing a replacement without compromising the overall floor structure. It can typically be done in a small room in under 30 minutes, making it an appealing DIY project. However, for lower-quality vinyl, the second method of cutting and gluing a replacement plank may involve significant downsides, such as increased susceptibility to moisture damage. Tools and Techniques: Essential Gear for Your DIY Project Gathering the right tools is key to ensuring a smooth repair project. As you embark on this DIY journey, you’ll need items like a utility knife, pry bar, circular saw, and super glue. Beyond just tools, a clear workspace and a well-planned approach can significantly minimize the time and effort involved in repairs. As always, safety should be your priority; wearing protective gear can prevent injuries during this home improvement project. Preventative Measures: Keeping Your Vinyl Flooring in Great Condition After completing the repairs, it’s imperative to take steps towards protecting your flooring. Regular cleaning and maintenance not only enhance its longevity but also maintain its appearance. Investing in felt pads for furniture legs can reduce scratching, while a solid mat at entrances can trap dirt before it damages your planks. By adopting mindful practices, you can preserve your flooring and avoid future repairs. Considering Professional Help for Complex Repairs While many homeowners take pride in completing DIY repairs, there are situations where professional intervention may be warranted. If you're dealing with extensive damage or multiple planks across large areas, consulting a floor repair specialist can save you from potential headaches. A trained professional brings the necessary expertise to ensure that your flooring maintains its beauty and functionality over time. Conclusion: Empower Your Renovation Skills Repairing your vinyl plank flooring can be a rewarding experience, empowering you to improve your home on your own terms. From identifying damage to making the right repairs, each step involves learning and discovery. Don't shy away from getting your hands dirty—embrace the DIY spirit! Remember, whether it’s a small scratch or a plank replacement, the right mindset and preparation are keys to successfully reviving your flooring. For more engaging renovation tips and expert advice, subscribe to our newsletter to transform your home projects into beautiful realities!

07.16.2025

Unlock Energy Savings: Heat Pump Thermostat Wiring Made Simple

Update Understanding the Importance of Proper Heat Pump Thermostat Wiring Before diving into the nitty-gritty of heat pump thermostat wiring, let’s take a moment to understand its significance. A properly wired thermostat is crucial for maximizing the efficiency of your heat pump system, which directly impacts your energy usage and your utility bills. Many homeowners underestimate the role a thermostat plays in regulating their comfort. When done right, it enhances control over temperature settings while ensuring your heat pump operates smoothly. Gathering Your Tools and Materials: Start with the Right Setup A successful DIY project begins with the right tools and materials. You’ll need a marker for labeling wires, a non-contact voltage tester to ensure safety, and a couple of screwdrivers—Phillips and flathead. Additionally, make sure to have wire strippers and light-colored electrical tape or masking tape handy. Your new heat pump thermostat should come with mounting screws and hardware, which will further assist in your installation process. Step-by-Step Guide: Making the Wiring Task Simple Now that you've got your tools at the ready, let's break down the process step by step. This guide is designed to be straightforward, ensuring that even first-time DIYers can tackle heat pump thermostat wiring without feeling overwhelmed. Step 1: Turn Off the PowerBefore beginning any electrical work, safety comes first! Locate and turn off the disconnect switch for your air handler or furnace, commonly found near the unit. If this is inaccessible, shut off the circuit breaker at your home’s electrical panel. Step 2: Verify the WiringWith safety measures in place, it’s time to check your existing thermostat. Remove the faceplate to uncover the wiring and use a non-contact voltage tester to ensure no power is flowing. This is crucial to avoid any electrical shock. Step 3: Remove the Old ThermostatNow, carefully detach the wires from the old thermostat, noting where each one was connected. Labeling each wire with tape can help you avoid confusion during the installation of the new thermostat. Step 4: Attach the New ThermostatFeed the thermostat wires through the mounting base of your new device. Level the base and secure it to the wall, then connect each of the labeled wires to the appropriate terminals. Go over the wiring diagrams included with your new thermostat for guidance. A Broader Perspective: Importance of Thermostat Selection Choosing the right thermostat is as essential as wiring it correctly. Smart thermostats can help optimize your heat pump’s performance by learning your schedule and preferences, adjusting settings accordingly to save energy. Modern models often have features such as remote access, which allows you to control your home’s heating even when you’re not there. Beyond the Basics: Common Myths About Thermostat Wiring As with many DIY projects, there are common misconceptions surrounding heat pump thermostat wiring. Some homeowners believe that professional installation is the only way to ensure safety and efficiency. However, with thorough guidelines and safety practices, these tasks are entirely manageable on your own. It is also mistakenly thought that only specific thermostats can be used with heat pumps, when in fact, many models can function well with the right setup. Real-Life Anecdote: Success Stories from DIYers Many homeowners have found success in replacing their thermostats, leading to more efficient heating and cooling. For instance, one family shared how changing to a smart thermostat helped reduce their energy bill by nearly 20% over the winter months. Their story illustrates not just the savings, but also the satisfaction of taking control of home maintenance. Final Thoughts: Take the Leap into DIY Wiring your heat pump thermostat might seem daunting, but with the right mindset and resources, it’s a fulfilling project that enhances your home’s efficiency. As you embark on this journey, remember the safety guidelines and the valuable insights shared in this article. Are you ready to take charge of your home’s comfort and efficiency? Give it a try today and feel empowered as you embrace your DIY skills!

Terms of Service

Privacy Policy

Core Modal Title

Sorry, no results found

You Might Find These Articles Interesting

T
Please Check Your Email
We Will Be Following Up Shortly
*
*
*