Add Row
Add Element
cropper
update
Ultimate Home DIY
update
Add Element
  • Home
  • Categories
    • Home Hacks
    • Tool Tips
    • Green Living
    • Renovation
    • Fix It
    • Decor Dreams
    • Skill School
May 03.2025
3 Minutes Read

Unlock Your DIY Potential: How to Fix Holes in Drywall Easily

Close-up of drywall repair with a putty knife.

Master the Art of Drywall Repair with Simple Steps!

Small holes and cracks in drywall may seem daunting, but they're common in households and can often be repaired by homeowners with a bit of knowledge and the right tools. Whether it's from a mishap during moving furniture or an accidental encounter with a doorknob, knowing how to address these imperfections can enhance your home's aesthetics and maintain its value.

Essential Tools and Materials for Your Repair

Before you dive into the repair process, it's crucial to have the right tools at your disposal. For a successful drywall fix, you'll need:

  • A putty knife – Ideal for applying spackle smoothly.
  • A sanding sponge – To ensure the area is prepped correctly.
  • A work light – This helps illuminate flaws that could otherwise be overlooked.
  • Fine-grit sandpaper – To finish sanding after the spackle dries.
  • High-quality spackle – Lightweight, non-shrinking compounds are recommended for small holes.
  • Clean rags – For dusting and cleaning surfaces as you work.
  • Paint – To blend the repaired area with the surrounding wall.

Step-by-Step Guide to Fixing a Hole in Drywall

Now that you have what you need, let's walk through the repair process in six easy steps:

Step 1: Illuminate the Area

Before you start, turn on your work light. This illumination reveals all imperfections, ensuring you don’t miss any spots that need fixing. Addressing everything at once prevents future rework.

Step 2: Prepare the Surface

Use a fine-grit sanding sponge or a putty knife to sand down loose or peeling edges around the hole. This step guarantees that your spackle will adhere effectively to the drywall surface.

Step 3: Clean the Area

After sanding, dust will inevitably linger. It's essential to remove this debris using a damp rag; failure to do so can compromise the spackle's adhesion.

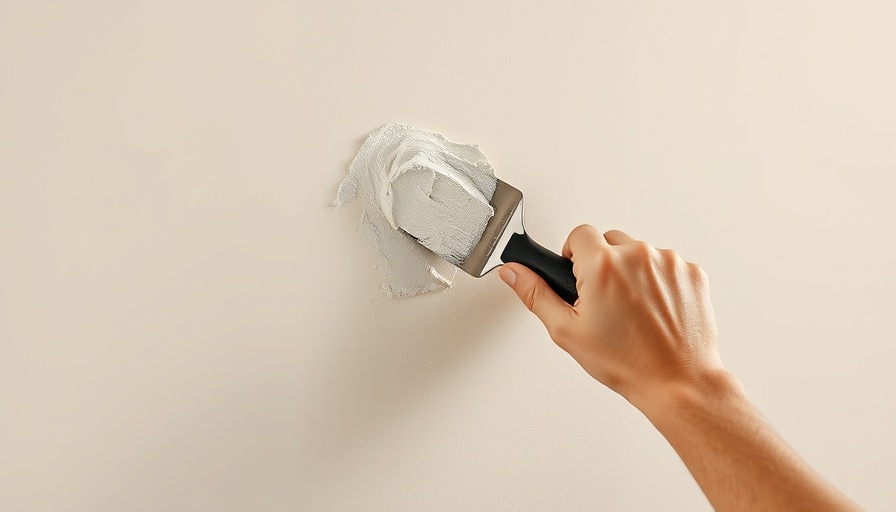
Step 4: Apply Spackle

With your clean surface ready, apply a generous amount of spackle to the hole using your putty knife. Press firmly to fill the hole completely, ensuring the mixture is spread evenly across the area.

Step 5: Drying Time

Patience is key here! Allow the spackle to dry for at least one to five hours, depending on your climate conditions. Rushing this phase might lead to a less-than-perfect finish.

Step 6: Sand and Paint

Once dried, use a fine-grit sanding sponge to level the surface. Finally, paint over the area with the same color as your wall. Voila! You’ve successfully repaired your drywall!

The Value of DIY Home Repairs

Learning how to fix drywall holes not only saves you money but also empowers you to take charge of your home maintenance. By acquiring new skills, you keep your living space looking pristine and can tackle other renovation projects down the line.

Common Pitfalls to Avoid

A few common mistakes can hinder your drywall repair. One is applying the spackle too soon without proper drying time, which can lead to unsightly blemishes. Additionally, failing to clean the surface thoroughly can result in poor adhesion, leading your repair to crack and peel over time. Understanding these pitfalls allows you to achieve professional-looking results effortlessly.

Resources and Tools for DIY Enthusiasts

Several online tutorials and home repair workshops can help you hone your skills. Do not hesitate to seek guidance from professionals or seasoned DIYers. Engaging with communities focused on home renovations can further fuel your enthusiasm for DIY projects.

Armed with these steps and insights on drywall repairs, you're now capable of tackling this common household project like a pro! Not only will you enhance your home, but you'll also cultivate the satisfying skill of DIY home repair.

To keep your home looking its best and learn even more about DIY home improvement, sign up for our newsletter and become a savvy homeowner!

Home Hacks

1 Views

0 Comments

Write A Comment

*
*
Related Posts All Posts
07.18.2025

Are Car Night View Cameras Worth It? Explore Safety, Pros and Cons

Update Understanding Car Night View CamerasCar night vision cameras are becoming features of high-end vehicles, aimed at enhancing safety during low-light conditions. These technologies, such as the Night View Assist offered by Mercedes-Benz, utilize infrared beams to provide a clearer picture of the road when visibility is poor. They can detect pedestrians at a distance of up to 80 meters and highlight them on the driver's display, potentially preventing accidents at night. However, as with any technology, the significant question arising is whether they genuinely enhance vehicle safety or merely add complexity to an already tech-filled drive.Evaluating the Effectiveness of Night Vision CamerasWhile the prospect of a camera that helps see in the dark sounds promising, its practicality depends on various conditions. Research indicates that climate plays a crucial role. For instance, night vision cameras can struggle in inclement weather, such as rain, snow, or fog, which can obscure both the camera's view and its effectiveness. Furthermore, Kelley Blue Book has pointed out that while these cameras can identify living creatures and stationary hazards, they have limitations with inanimate objects that do not emit heat, like debris on the road. Therefore, understanding one’s driving environment becomes essential in determining whether such technology adds true value.The Car Brands Leading in Night Vision TechnologyLuxury brands are leading the way in the night vision camera market. Aside from Mercedes-Benz, manufacturers such as Toyota, BMW, Cadillac, and Lexus are integrating this technology into their premium models. However, for those who may not want to invest in a luxury vehicle, several aftermarket dash cameras can provide night vision capabilities, although they come with varying levels of effectiveness.The Cost-Value Relationship of Night Vision FeaturesInvesting in a car equipped with a night vision camera comes with questions around cost-effectiveness. According to industry feedback, these safety features may not provide sufficient benefits to justify their cost, depending on an individual’s budget and driving habits. While the intent behind such technologies is accident prevention, potential buyers must weigh these costs against actual safety gains. Will you drive more safely in the dark? This is a pivotal question that requires careful consideration.Personal Perspective: The Emotional Talk About Safety GadgetsSafety on the road transcends technology; it is also an emotional experience. The fear of unseen hazards often lurks in the minds of drivers at night. Night vision cameras can provide a semblance of reassurance, filling in the gaps of visibility that the human eye misses. Yet, as technology evolves, it's critical to engage with the tools we select consciously. Embracing safety technologies should not distract us from remaining vigilant and responsible behind the wheel.Conclusion: Navigating the Future of Auto Safety TechnologiesCar night view cameras present a tangible example of how technology endeavors to enhance our driving safety, especially in challenging conditions. However, as with any tool, their true effectiveness lies in how we utilize them. As we continue to navigate advancements in car safety, we must remain cautious of substituting technology for human judgment. So, if you're considering whether to invest in a night vision camera for your vehicle, take into account the conditions in which you drive and your budget to determine whether this feature fits your needs and if it makes your journey a little brighter.

07.17.2025

Mastering Vinyl Plank Flooring Repairs: Essential DIY Insights for Homeowners

Update Understanding Vinyl Plank Flooring: A Reliable Choice for Homeowners Vinyl plank flooring has emerged as a popular choice among homeowners for its durability and aesthetic appeal. Unlike traditional hardwood, vinyl planks are resistant to moisture, scratches, and staining, making them ideal for high-traffic areas. However, even the sturdiest flooring can encounter damage over time due to heavy furniture, pet claws, or everyday wear and tear. Knowing how to properly repair your flooring can save you time and money in the long run. Identifying Damage: The First Step in Repairing Vinyl Plank Flooring Before you can fix your vinyl planks, it's essential to identify the type of damage. Is it a scratch that only affects the surface, a gouge that penetrates deeper, or a completely detached plank? For minor scratches, a simple polish may suffice, but if you’re looking at more significant issues, you could need to replace the planks. Recognizing when to rely on repairs versus when to consider replacements is crucial in preserving the integrity of your floor. Repair Methods for Different Flooring Qualities As mentioned in the step-by-step guide, two primary methods exist: removing and replacing planks or modifying the existing structure. For those with high-quality, name-brand vinyl flooring, the first method is often recommended. This involves unclicking the damaged plank and installing a replacement without compromising the overall floor structure. It can typically be done in a small room in under 30 minutes, making it an appealing DIY project. However, for lower-quality vinyl, the second method of cutting and gluing a replacement plank may involve significant downsides, such as increased susceptibility to moisture damage. Tools and Techniques: Essential Gear for Your DIY Project Gathering the right tools is key to ensuring a smooth repair project. As you embark on this DIY journey, you’ll need items like a utility knife, pry bar, circular saw, and super glue. Beyond just tools, a clear workspace and a well-planned approach can significantly minimize the time and effort involved in repairs. As always, safety should be your priority; wearing protective gear can prevent injuries during this home improvement project. Preventative Measures: Keeping Your Vinyl Flooring in Great Condition After completing the repairs, it’s imperative to take steps towards protecting your flooring. Regular cleaning and maintenance not only enhance its longevity but also maintain its appearance. Investing in felt pads for furniture legs can reduce scratching, while a solid mat at entrances can trap dirt before it damages your planks. By adopting mindful practices, you can preserve your flooring and avoid future repairs. Considering Professional Help for Complex Repairs While many homeowners take pride in completing DIY repairs, there are situations where professional intervention may be warranted. If you're dealing with extensive damage or multiple planks across large areas, consulting a floor repair specialist can save you from potential headaches. A trained professional brings the necessary expertise to ensure that your flooring maintains its beauty and functionality over time. Conclusion: Empower Your Renovation Skills Repairing your vinyl plank flooring can be a rewarding experience, empowering you to improve your home on your own terms. From identifying damage to making the right repairs, each step involves learning and discovery. Don't shy away from getting your hands dirty—embrace the DIY spirit! Remember, whether it’s a small scratch or a plank replacement, the right mindset and preparation are keys to successfully reviving your flooring. For more engaging renovation tips and expert advice, subscribe to our newsletter to transform your home projects into beautiful realities!

07.16.2025

Unlock Energy Savings: Heat Pump Thermostat Wiring Made Simple

Update Understanding the Importance of Proper Heat Pump Thermostat Wiring Before diving into the nitty-gritty of heat pump thermostat wiring, let’s take a moment to understand its significance. A properly wired thermostat is crucial for maximizing the efficiency of your heat pump system, which directly impacts your energy usage and your utility bills. Many homeowners underestimate the role a thermostat plays in regulating their comfort. When done right, it enhances control over temperature settings while ensuring your heat pump operates smoothly. Gathering Your Tools and Materials: Start with the Right Setup A successful DIY project begins with the right tools and materials. You’ll need a marker for labeling wires, a non-contact voltage tester to ensure safety, and a couple of screwdrivers—Phillips and flathead. Additionally, make sure to have wire strippers and light-colored electrical tape or masking tape handy. Your new heat pump thermostat should come with mounting screws and hardware, which will further assist in your installation process. Step-by-Step Guide: Making the Wiring Task Simple Now that you've got your tools at the ready, let's break down the process step by step. This guide is designed to be straightforward, ensuring that even first-time DIYers can tackle heat pump thermostat wiring without feeling overwhelmed. Step 1: Turn Off the PowerBefore beginning any electrical work, safety comes first! Locate and turn off the disconnect switch for your air handler or furnace, commonly found near the unit. If this is inaccessible, shut off the circuit breaker at your home’s electrical panel. Step 2: Verify the WiringWith safety measures in place, it’s time to check your existing thermostat. Remove the faceplate to uncover the wiring and use a non-contact voltage tester to ensure no power is flowing. This is crucial to avoid any electrical shock. Step 3: Remove the Old ThermostatNow, carefully detach the wires from the old thermostat, noting where each one was connected. Labeling each wire with tape can help you avoid confusion during the installation of the new thermostat. Step 4: Attach the New ThermostatFeed the thermostat wires through the mounting base of your new device. Level the base and secure it to the wall, then connect each of the labeled wires to the appropriate terminals. Go over the wiring diagrams included with your new thermostat for guidance. A Broader Perspective: Importance of Thermostat Selection Choosing the right thermostat is as essential as wiring it correctly. Smart thermostats can help optimize your heat pump’s performance by learning your schedule and preferences, adjusting settings accordingly to save energy. Modern models often have features such as remote access, which allows you to control your home’s heating even when you’re not there. Beyond the Basics: Common Myths About Thermostat Wiring As with many DIY projects, there are common misconceptions surrounding heat pump thermostat wiring. Some homeowners believe that professional installation is the only way to ensure safety and efficiency. However, with thorough guidelines and safety practices, these tasks are entirely manageable on your own. It is also mistakenly thought that only specific thermostats can be used with heat pumps, when in fact, many models can function well with the right setup. Real-Life Anecdote: Success Stories from DIYers Many homeowners have found success in replacing their thermostats, leading to more efficient heating and cooling. For instance, one family shared how changing to a smart thermostat helped reduce their energy bill by nearly 20% over the winter months. Their story illustrates not just the savings, but also the satisfaction of taking control of home maintenance. Final Thoughts: Take the Leap into DIY Wiring your heat pump thermostat might seem daunting, but with the right mindset and resources, it’s a fulfilling project that enhances your home’s efficiency. As you embark on this journey, remember the safety guidelines and the valuable insights shared in this article. Are you ready to take charge of your home’s comfort and efficiency? Give it a try today and feel empowered as you embrace your DIY skills!

Terms of Service

Privacy Policy

Core Modal Title

Sorry, no results found

You Might Find These Articles Interesting

T
Please Check Your Email
We Will Be Following Up Shortly
*
*
*