Add Row
Add Element
cropper
update
Ultimate Home DIY
update
Add Element
  • Home
  • Categories
    • Home Hacks
    • Tool Tips
    • Green Living
    • Renovation
    • Fix It
    • Decor Dreams
    • Skill School
August 09.2025
3 Minutes Read

Unlock the Secrets to Repairing Laminate Flooring Like a Pro

Hand repairing laminate flooring with dark planks.

Understanding Laminate Flooring Durability

Laminate flooring is a popular choice for homeowners due to its affordability, versatility, and resilience. However, even the most durable flooring can suffer from wear and tear over time. Understanding the common types of damage and how they occur can empower you to take action before minor issues escalate into major repairs.

Common Types of Laminate Flooring Damage

Damage to laminate flooring can result from various causes, such as moisture exposure, scratches from sharp objects, or even heavy furniture that leaves indents. The good news is that many minor repairs can be done without professional help, allowing homeowners to maintain their floors' appearance and functionality with little investment.

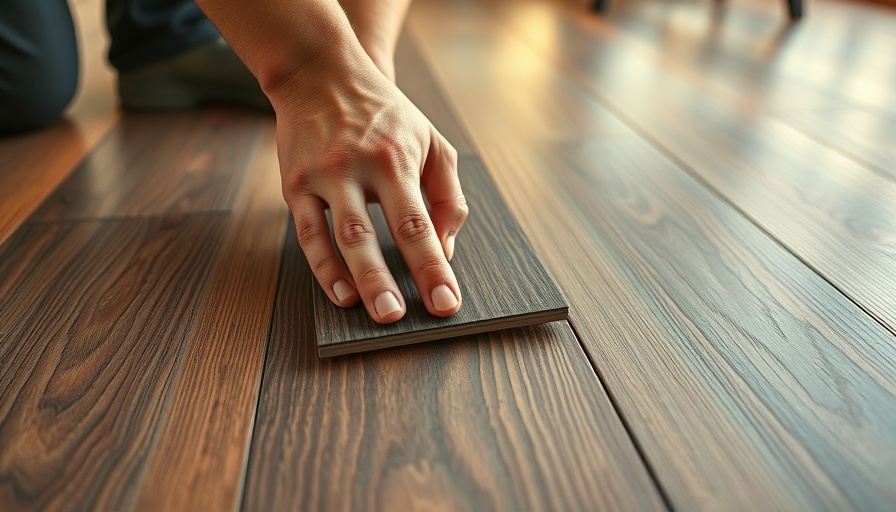
The Power of DIY Repairs: Tools You’ll Need

Before diving into repairs, it’s essential to gather a few tools. A laminate flooring repair kit typically includes a repair marker, putty, and other essential items designed specifically for your flooring type. Selecting the right kit not only makes repairs easier but also ensures that the colors and textures match seamlessly with your existing floor.

Step-by-Step Guide to Repairing Minor Scratches

The beauty of laminate flooring is that minor scratches can often be concealed effectively. Here’s how:

  1. Clean the Area: Begin by removing dirt and debris using a damp cloth. A clean workspace ensures that any repairs you make will adhere properly.
  2. Utilize a Repair Marker: For small scratches, a repair marker can quickly restore the floor's surface. Apply it lightly and wait about 30 minutes for it to dry.
  3. Use Putty for Deep Scratches: Larger defects require more effort. Use putty to fill in the scratch, smoothing it with a putty knife. Allow it to dry completely before attempting to clean the area.
  4. Final Touch-Up: Once the putty has set, remove any mess and polish the area with a damp cloth to restore its shine.

Dealing with Water Damage: Prevention and Solutions

While laminate flooring is water-resistant, it isn’t entirely waterproof. Ignoring spills or prolonged exposure to moisture can lead to mold and damage. If you suspect water damage, it’s crucial to act quickly:

  1. Remove Moisture and Mold: Immediately clear any standing water with a mop or towel. Use a mixture of vinegar and water to eliminate any potential mold.
  2. Replace Damaged Planks: If a plank becomes unfixable due to extensive water damage, you’ll need to remove it. Ensure you install a new plank that matches the rest of your flooring.

Preventative Measures for Long-Term Maintenance

Maintaining your laminate floors can extend their life significantly. Place mats at entryways, avoid using vacuum cleaners with beater bars, and avoid dragging heavy furniture across the floor. Simple preventive measures ensure your floors remain in excellent condition for years.

Empowering Homeowners: The Benefits of DIY Repairs

Taking on laminate floor repairs by yourself not only saves money but also empowers you as a homeowner. Learning to handle these small tasks makes home maintenance less daunting and allows you to control the condition of your living spaces. Personally taking charge of home improvements fosters a deeper connection to your space, enhancing your overall sense of well-being and pride in your home.

Take Action and Transform Your Home

Your home is your sanctuary, and keeping it in top shape reflects your style and care for your living environment. With a few simple tools and the right guidance, you can repair your laminate flooring and maintain its beauty for years to come. Embrace the DIY spirit and take your home improvement journey into your hands!

Skill School

0 Views

0 Comments

Write A Comment

*
*
Related Posts All Posts
08.08.2025

SPC vs WPC Flooring: Discover the Best Option for Your Home

Update SPC vs WPC Flooring: Which Is Right for Your Home? Upgrading your flooring can feel like a daunting task with all the options on the market—especially when you consider two prime contenders: SPC (Stone Plastic Composite) and WPC (Wood Plastic Composite) flooring. Both styles are well-known for their durability and water resistance, making them favorites among homeowners looking to improve their living spaces. In this article, we’ll dive deep into their differences, including composition, comfort, cost, and other key factors to help you make the best choice for your home. Understanding the Core Differences At their core, SPC and WPC flooring are both designed to withstand moisture and wear, but they differ significantly in structure. SPC features a solid rigid core made from stone powder, recycled PVC, and stabilizer, which offers an impressive level of durability. WPC, on the other hand, has a core composed of a blend of wood flour and PVC, yielding a softer, more comfortable underfoot experience. Explore the Layers of Each Option Both SPC and WPC flooring consist of multiple layers, ensuring they meet aesthetic and functionality desires: SPC Flooring includes: Backing Layer: The foundation layer provides stability and often includes an underlayment for extra comfort. SPC Core: It is reliable and water-resistant, offering superior durability without expanding in wet conditions. Printed Vinyl Layer: This layer gives the visual appeal of wood or stone. Wear Layer: The top layer protects against scratches and day-to-day wear, and a thicker wear layer means extra protection. WPC Flooring comprises: Backing Layer: Also a sturdy base, often equipped with an underlayment for enhanced comfort underfoot. WPC Core: Contains wood plastic composite, making it flexible and more comfortable for walking. Printed Vinyl Layer: Mimics hardwood floors, providing a stylish look. Wear Layer: Similar to SPC, a thick wear layer helps in resisting scratches and damage over time. Comparing Costs: Worth the Investment? Cost is a significant factor when choosing between SPC and WPC. Generally, SPC flooring tends to be more affordable than WPC, making it a favored choice for budget-conscious homeowners. While WPC offers numerous benefits, its higher price may come with added features, such as sound absorption and a softer feel, that some may find worthwhile. Comfort Underfoot: Making the Right Choice SPC flooring is known for its robust construction, which provides long-lasting performance. However, its rigid nature can sometimes feel cold and hard, particularly in colder climates. WPC, conversely, offers more flex and warmth underfoot, making it a cozy choice for homes where comfort is a priority, especially in winter. Best Applications: Where to Use Each Type SPC floors are well-suited for high-traffic areas, kitchens, and even bathrooms due to their exceptional moisture resistance. WPC is ideal for living rooms, bedrooms, or areas where comfort is desired, though it can also perform well in moisture-prone areas, thanks to its water-resistant core. Long-Term Durability: Which Lasts Longer? When it comes to durability, SPC flooring has the edge due to its superior rigid core, which is resistant to dents and scratches. It’s an excellent choice for homes with pets or kids where wear and tear is more pronounced. WPC is durable but is generally more prone to damage from heavy impacts since it is softer than SPC. Conclusion: Choosing Your Flooring Wisely Deciding between SPC and WPC flooring ultimately comes down to your specific needs and lifestyle. If you prioritize durability and affordability, SPC may be the right choice. However, if warmth and comfort are more significant in your home environment, WPC could be the way to go. By understanding the strengths and weaknesses of each type, you can make an informed decision that suits your home perfectly. Ready to revamp your space? Explore flooring options and find the perfect fit for your home today!

07.28.2025

Discover 15 Easy Homemade Milk Bath Recipes for Skin Revival

Update Revitalize Your Skin with Homemade Milk Baths If you’re struggling with rough, dry skin, homemade milk baths may just be the soothing solution you’ve been searching for. This delightful self-care ritual not only nourishes your skin but also transforms your bathing experience into a luxurious spa-like indulgence right in your own home. In this article, we will explore 15 easy homemade milk bath recipes that promise luxuriously soft skin. The Benefits of Milk Baths Milk baths are not just a trendy self-care routine; they come packed with benefits that can address various skin issues. Milk is rich in vitamins, minerals, and fats that enhance skin health, providing hydration and softness. Ingredients like coconut oil, rose petals, and oatmeal offer additional benefits such as: Hydration: Help to maintain moisture levels in the skin, preventing dryness. Soothing Properties: Ingredients like oats have anti-inflammatory effects that help to calm irritated skin. Antioxidant Protection: Many ingredients combat aging and protect against environmental damage. Simple Recipes to Try at Home Here are 15 easy homemade milk bath recipes that cater to various skin needs: 1. Coconut Oil Milk Bath Coconut oil is an excellent moisturizer that hydrates and softens the skin. Combined with soothing baking soda and powdered milk, this recipe is straightforward and effective. Ingredients: 1/2 cup baking soda, 15-20 drops of coconut oil, 1 ½ cups powdered milk. Instructions: Mix the ingredients thoroughly and store in an airtight container. Use ½ to 1 cup per bath. 2. Vanilla, Rose, and Salt Milk Bath This luxurious recipe combines the calming scents of vanilla and rose with mineral-rich bath salts. Ingredients: 1 cup baking soda, ½ cup citric acid, ¼ cup corn starch, ½ cup powdered buttermilk, 1/3 cup bentonite clay, 1/3 cup colloidal oatmeal, 1 tablespoon titanium dioxide, 1.5 tablespoons cocoa butter, 1.5 tablespoons shea butter, 3 tablespoons fragrance oil, 5-6 drops of vanilla, 1 tablespoon oats, and 1 tablespoon rose petals. Instructions: Mix dry ingredients, then incorporate wet ingredients for a luxurious soak. Enhancing Your Milk Bath Experience To maximize the benefits of your milk baths, consider adding essential oils or herbs based on your skin’s needs. Essential Oils: Lavender for relaxation, tea tree for its antibacterial properties, or chamomile for soothing irritations. Herbs: Incorporating dried herbs such as calendula or chamomile can enhance the bath’s relaxing properties. Why These Recipes Matter In a world where self-care often takes a back seat, creating time to pamper yourself with a milk bath can lead to profound benefits for your mental and physical health. This soothing practice not only helps to rejuvenate your skin but also provides an opportunity to unwind and recharge. Future Trends in Self-Care As people continue to seek natural solutions for their skin, milk baths are unlikely to fade in popularity. With a growing emphasis on DIY remedies, expect to see more innovative uses of natural ingredients that harness the power of milk baths, incorporating various cultural practices and holistic approaches to health. Common Misconceptions About Milk Baths Many people assume that milk baths are difficult to prepare or only beneficial for certain skin types. However, with simple ingredients often found in your kitchen, anyone can enjoy the calming, nourishing experience of a milk bath—regardless of skin type. Additionally, the relaxing atmosphere created can positively affect mental health, making it a versatile self-care option. Take the Plunge! Now that you have all the tools and knowledge to create the perfect milk bath, what are you waiting for? Transform your self-care routine and give your skin the nourishment it craves. Try one of the above recipes tonight and feel the difference for yourself!

07.27.2025

Elevate Your Property Value with These Smart Home Improvements

Update Transform Your Home with Smart Upgrades That MatterIf you're a homeowner looking to elevate your property's value, you're in the right place. The secret to boosting your home's worth lies in smart home improvements that seamlessly blend modern technology with your daily lifestyle. By making the right upgrades, you can ensure your home isn’t just statistically valuable but also a more comfortable, efficient, and attractive place for potential buyers.Upgrade to a Smart Thermostat: Comfort Meets EfficiencyConsider this: no more fiddling with outdated, manual thermostats. Smart thermostats like Nest and Ecobee allow you to control your home's temperature remotely through your smartphone, providing convenience and significant energy savings. In fact, homeowners report savings of 10-20% on their heating and cooling costs after switching. This upgrade doesn't just enhance your lifestyle; it appeals to eco-conscious buyers, positioning your home as modern and energy-efficient.A Little Kitchen Revamp Goes a Long WayWe all know that the kitchen symbolizes warmth and togetherness in a home. Instead of a full remodel, which can be costly, focus on minor yet impactful changes. Simple upgrades such as new cabinet handles, a stylish backsplash, or even fresh paint for your cabinets can breathe new life into your kitchen. Real estate experts assert that these improvements can yield up to an 80% return on investment. It’s these small tweaks that can make your kitchen stand out in a competitive market.Curb Appeal: The Power of Smart LandscapingYour home’s exterior is the first impression potential buyers get, so transforming your yard can be pivotal. Invest in smart landscaping features like automated outdoor lighting and irrigation systems. Not only do these upgrades make your yard aesthetically pleasing and functional, but they also suggest a low-maintenance lifestyle, which is highly appealing to busy homeowners. Picture elegant path lights guiding guests or sprinklers that know exactly when to activate—these details can set your property apart.The Value of Finishing Your Basement or AtticUnlock the hidden potential of your home by finishing your basement or attic. This might require a larger initiative, but adding usable square footage can vastly increase your property's value, especially in urban settings where space is limited. Think of possibilities like a cozy home office, a gym, or even a rental unit. If budget constraints are a concern, prioritize essential elements like insulation and lighting, and build from there. The added space will make your home more attractive to buyers looking for versatility.Invest in Energy-Efficient Windows and DoorsLastly, energy-efficient windows and doors are often overlooked yet incredibly valuable. When buyers see ENERGY STAR-rated models, they recognize a lower chance of energy loss and lower utility costs—a big plus in today's market. Not to mention, these upgrades work magic in enhancing your home’s curb appeal, making it feel modern and well-maintained from both the inside out.Making Informed Decisions for a Profitable FutureAs a homeowner, making informed decisions about your property requires a blend of practicality and forward-thinking. Upgrades not only enhance your day-to-day comfort but contribute to a higher resale value, ensuring your investment pays off. Consider utilizing platforms like UrbanTasker to connect with reliable professionals for these upgrades easily.Educate Yourself and Start Improving Today!In the end, every upgrade you make is a step toward enhancing your living space and increasing your property’s appeal in a competitive housing market. Whether you’re preparing to sell soon or just want to enjoy a more efficient home, investing in these upgrades pays off. So why wait? Assess your space, draw up a plan, and start your smart home transformation today!

Terms of Service

Privacy Policy

Core Modal Title

Sorry, no results found

You Might Find These Articles Interesting

T
Please Check Your Email
We Will Be Following Up Shortly
*
*
*