Add Row
Add Element
cropper
update
Ultimate Home DIY
update
Add Element
  • Home
  • Categories
    • Home Hacks
    • Tool Tips
    • Green Living
    • Renovation
    • Fix It
    • Decor Dreams
    • Skill School
Add Row
Add Element
June 28.2025
3 Minutes Read

Master the Art of Horseradish Harvesting: A Guide for Homeowners

Freshly harvested horseradish roots close-up, natural pile.

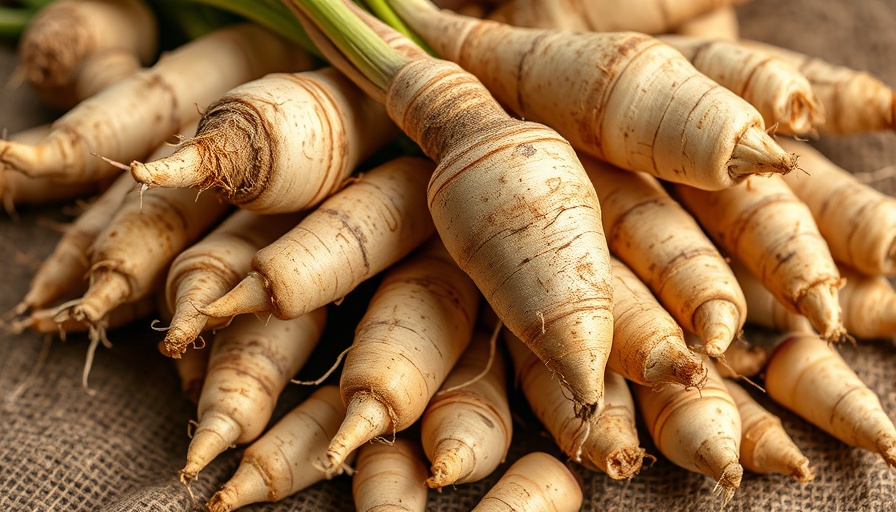
Understanding Horseradish: A Root Vegetable Like No Other

Horseradish is more than just a spicy condiment; it's a root vegetable that carries a plethora of health benefits. Packed with antioxidants, anti-inflammatory properties, and potentially anti-carcinogenic effects, this humble root can greatly enhance both the flavor of your dishes and your health. To maximize its taste and benefits, knowing the right time and method to harvest is essential.

When Is the Ideal Time to Harvest Horseradish?

The best time to harvest horseradish is after the first hard frost but before the ground freezes solid. According to experts like Carol Waters, a commercial fruit and vegetable production educator, harvesting too early may prevent the roots from reaching their fullest flavor and size, leading to a disappointing culinary experience. Typically, horseradish grows for about a year before reach maturity, making fall the prime season for a successful harvest. This timing allows the plant to store extra starches and sugars, enhancing the flavor profile of the root.

Harvesting Techniques: Manual or Mechanical?

Different harvesting methods can yield different results, with manual digging being the preferred choice for gardeners and small-scale producers. Linda Langelo, a horticulture specialist, notes that using a garden fork or spade can help loosen the soil around the root without damaging it. The key is to dig around a foot from the base and gently extract the horseradish to minimize breakage. Remember, the ideal root size for future planting is eight inches or longer. With proper handling, your horseradish can thrive for future harvests.

Proper Storage: Keeping Horseradish Fresh

After harvesting, how you store horseradish is crucial for maintaining its freshness and flavor. If you plan to use the root shortly, wash it before placing it in a sealed plastic bag in the refrigerator. For those wishing to store horseradish over a longer term, consider using a root cellar filled with sand or store it in a plastic bag with moist sand in your refrigerator. This ensures that your horseradish remains viable for your culinary needs well into the future.

Common Missteps and How to Avoid Them

While harvesting horseradish may seem straightforward, there are common pitfalls one should be aware of. Here are a few dos and don’ts:

  • Do: Harvest after the first frost for optimal roots.
  • Don’t: Rush the process; impatience can lead to underdeveloped flavors.
  • Do: Use protective gloves if handling large quantities, as the sap from horseradish can cause skin irritation.
  • Don’t: Forget to document which roots are for replanting!

Future Trends: The Rising Popularity of Home Gardening

The growing trend of home gardening, especially amidst increasing health awareness, indicates the value of mastering skills like horseradish harvesting. As more homeowners turn to DIY projects and sustainable living practices, taking control of what's on your plate has never been more appealing. With the right techniques at your disposal, the cultivation of horseradish not only becomes an enjoyable pursuit but a way to contribute positively to a healthier lifestyle.

Seizing Opportunities: Your Next Steps in Horseradish Harvesting

Armed with this knowledge, why not take the plunge into your horseradish harvesting adventure? By embracing the unique challenges and joys of this rewarding process, you’ll not only add a flavorful kick to your meals but also tap into a culinary legacy that connects you with the earth and its cycles.

For those looking to elevate their kitchen game, consider cultivating horseradish as a centerpiece of your home gardening efforts. It’s not just about flavor; it’s about taking charge of your food sources and bringing robust health benefits right to your table.

If you’re ready to harvest your horseradish and reap its benefits for your health and cooking, take action today! Check your garden or local nursery for horseradish plants, and apply these harvesting tips to enjoy this zesty root.

Home Hacks

0 Views

0 Comments

Write A Comment

*
*
Related Posts All Posts
06.27.2025

How to Properly Dispose of Cooking Oil for a Greener Home

Update The Hidden Dangers of Improper Cooking Oil Disposal Cooking is a delightful experience for many, but it also comes with responsibilities, especially when it comes to disposing of used cooking oil. A casual attitude toward disposal—like dumping oil down the drain—might seem harmless, yet it can create substantial issues over time. Improper disposal leads to clogs in plumbing, rancid odors, and significant costs for municipal sewer systems. As Jorge Argota, a cooking oil recycling expert, notes, used cooking oil acts like cholesterol in pipes, creating blockages that can last for years. Small amounts may seem inconsequential, but over time, they add up and can lead to serious plumbing problems. The Importance of Following Local Disposal Regulations Did you know local laws exist to prevent the disposal of large quantities of cooking oil in sinks? Many municipalities enforce fats, oils, and grease (FOG) ordinances to protect their sewer systems. These regulations not only highlight the community’s commitment to reducing environmental impact but also serve as valuable guidelines for homeowners. To comply with these regulations, residents can easily research their municipality’s rules by searching online for “FOG” regulations or by contacting the local public works department. This engagement creates awareness about the environment and helps maintain our vital sewer systems. Best Practices for Disposing of Cooking Oil So, how can you dispose of cooking oil properly? The answer lies in a simple mantra: cool, contain, recycle. For smaller quantities, such as half a cup or less, let the oil cool, wipe it with paper towels, and throw it away in the trash. If you’ve used a few cups, place the oil in a sealed container like a jar or milk carton before discarding it. Always remember, if the oil is clean, you can strain and reuse it! For larger amounts, like from a deep fryer, save it in a sturdy container and take it to a local recycling center or hazardous waste facility. By taking these steps, you not only protect your home but also contribute positively to your community’s environmental efforts. Finding Local Cooking Oil Disposal Options In our busy lives, it can be tough to keep track of proper disposal methods. Fortunately, resources like Earth911’s cooking oil recycler locator can help you find drop-off points near you. An internet search for “cooking oil disposal near me” might yield local companies that specialize in recycling and safe disposal. It’s noteworthy that some communities set up collection points, especially during the holidays. For instance, Outagamie County, Wisconsin, allows residents to drop off up to 25 gallons of used cooking oil daily at their Resource Recovery Park. This ensures that the oil is processed correctly rather than damaging the environment or plumbing. Examples of Creative Upcycling: Making the Most Out of Used Cooking Oil What if you could repurpose your used cooking oil instead of tossing it? Options abound beyond straightforward disposal. You might consider using the oil in homemade candles, as a base for soap making, or crafting a natural insect repellent. Not only do these uses minimize waste, but they also give the oil a second life, making sustainable living a reality. Upcycling cooking oil promotes creativity and resourcefulness in home improvement projects, aligning with contemporary trends toward greener lifestyles. Final Thoughts on Sustainable Cooking Practices The journey toward sustainable living starts with small, actionable steps, and disposing of cooking oil correctly is one of them. As homeowners, it’s vital to understand the implications of our actions on the local environment. By following proper disposal methods, educating ourselves about regulations, and exploring creative uses for cooking oil, we can contribute to a healthier environment and enhance our well-being. Let's take pride in our cooking habits, ensuring that our kitchens are not only places of culinary delight but also centers for responsible living. Now that you've learned the essential steps for disposing of cooking oil, it’s time to put this knowledge into practice. Whether you’re planning your next meal or tidying up after a cooking frenzy, always remember to prioritize proper disposal methods. Your home, community, and the environment will thank you!

06.26.2025

What the Big 'L' on Cars Means: A Guide for Road Safety Awareness

Update Understanding the Significance of L Plates for New Drivers Learning to drive can be a rite of passage filled with excitement and anxiety. One way to communicate this to other drivers is through the use of L plates, or learner plates. As a universally recognized symbol of a novice driver, these plates signal to experienced road users that the person behind the wheel is still mastering their skills. Whether it's a learning permit holder, a driving instructor accompanied by a student, or guardians overseeing practice area drives, the presence of an L plate fosters a safer driving environment. Global Variations in the Use of L Plates While the concept of learner plates is commonplace, their implementations vary significantly across the globe. In the United Kingdom, for example, the law mandates that learner drivers display the L plate on both the front and back of their vehicle. Drivers must keep these plates visible at all times while on the road. This helps establish an understanding with other motorists to expect cautious driving patterns. Conversely, in Australia, L plates are prevalent but their specifications differ by state. Some states may require a different color scheme for learner plates, while others might suggest additional legal conditions, like curfews for learner drivers. In New Zealand, not only must learners display L plates, but they are required to have a fully licensed driver accompany them. This reflects a concerted effort to enhance safety during the learning phase. Similarly, Ireland has adopted a system where newly licensed drivers graduate from L (learner) plates to N (novice) plates, showcasing their journey toward full competence. Do L Plates Change Driving Laws? L plates are not just for decoration—they reflect legal obligations that vary across regions. In various locations, such as the United States and Canada, learners are often recognized via their driver’s license type rather than the physical identifier of an L plate. However, many beginner drivers, instructors, or parents elect to use a “Student Driver” sticker as an additional safety measure. This tradition emphasizes a key facet of driving: patience and understanding from seasoned drivers when encountering someone who is still learning. Why Are L Plates Important for Road Safety? Road safety is crucial, and L plates serve an essential role in keeping the roads safe for learners and experienced drivers alike. By displaying an L plate, a learner gets the chance to operate a vehicle while also receiving the respect they need from other motorists. They remind established drivers to accommodate learners who may need more time or space when they are adjusting to their learning curves. Implementing this visual cue is not just a local requirement; it’s a societal nuance that promotes a culture of safety. An understanding of the challenges that come with learning to drive can prompt experienced drivers to maintain a cautious distance behind L-plated vehicles. This can prevent potential accidents that might arise from impatience or frustration. Emotional Connection to the Learning Experience For many, learning to drive represents freedom and independence. Yet, with this comes the pressure of mastering complex skills. The L plate serves as an emotional anchor not just for the learner but also for onlookers who are reminded of their own experiences of uncertainty and learning. As a community, we have a responsibility to support new drivers in their development and reassure them that it is okay to make mistakes along the way. Actions You Can Take to Foster Road Safety Ultimately, the presence of an L plate can change how a community interacts with new drivers. You can contribute to a safer driving environment by: Practicing patience in traffic around learner drivers. Offering advice to new drivers when you're safely parked, highlighting the importance of continued learning. Encouraging learner drivers to display their L plates as a way to advocate for safety and caution on the road. These interactions not only empower novice drivers but also promote road safety as a shared responsibility across all communities. Conclusion: Embrace the Learning Journey The display of L plates goes beyond signaling that someone is a learner; it communicates a broader message about support, understanding, and community. By recognizing the importance of these plates and their role in road safety, we can collectively create an atmosphere where new drivers feel encouraged, empowered, and safe as they begin their journeys on the road.

06.25.2025

Unlock DIY Secrets: Your Newsletter Subscription Awaits!

Update Your Subscription Journey Begins Congratulations! You’ve successfully subscribed to receive exciting new content directly in your inbox. As a homeowner with a keen interest in DIY projects and home improvements, you’re now on the right path to enhancing your skills and transforming your living space. Your subscription means you'll get expert tips and articles tailored specifically to your interests, ensuring you never miss a beat in your home improvement ventures. What’s Coming Your Way? Prepare to dive into a world of knowledge with newsletters that cover a variety of essential topics, including: Stop Hiring Out These Home Repairs: Learn how to tackle the simplest repairs yourself, saving time and money. Air Conditioning Mistakes: Avoid common pitfalls that could lead to costly repairs and ensure your home stays cool and comfortable. Avoidable Backsplashes: Discover design tips from interior designers to make stylish yet practical choices in your home. Fueling Frequency Explained: Understand how often you should refuel your vehicle to prevent unnecessary issues. Removing Locking Lug Nuts: Master the skills needed to manage tire changes and maintenance without the key. Drilling into a Stud: A handy guide to ensure you hang items securely on your walls. Free Up Stuck Bolts: Simplify your projects with straightforward techniques to overcome challenging repairs. Value of Subscription: Unlocking Free Knowledge Your decision to subscribe is a smart move, allowing access to expert insights that can save you both time and money. Each newsletter is carefully curated to equip you with practical knowledge that not only enhances your abilities but also increases the value of your home. Imagine embarking on a DIY project, armed with maintenance tips that empower you to get the job done right! The Community Aspect: Joining Fellow DIY Enthusiasts Subscribing isn’t just about receiving tips; it’s about joining a community of like-minded individuals passionate about home improvement. Engaging in DIY projects encourages social connection, as you can share experiences, challenges, and triumphs with others who understand the joys and frustrations that come with renovating your space. Future Prospects: Embracing a Lifelong Learning Approach By staying subscribed, you’re committing to lifelong learning and skill development. The world of home improvement is ever-evolving with new trends and technologies. From green living solutions to smart home innovations, you’ll be updated with the latest in the industry, empowering you to make informed decisions about your home. Practical Tips to Get Started While eagerly awaiting your newsletters, here are some quick practical tips to jump-start your home improvement journey: Start Small: Choose a minor project that you can accomplish without feeling overwhelmed. Gather Tools: Invest in essential tools like a good drill, a screwdriver set, and measuring tape to get started on most projects. Utilize Online Resources: While waiting for your newsletter, check out online video tutorials related to upcoming articles to prep yourself. Final Thoughts: Creating Your Ideal Home Thank you for subscribing! This marks the beginning of an exciting journey to elevate your home, enhance your skills, and connect with an engaged community of DIY enthusiasts. Your commitment to learning will not only benefit your home but also contribute to a sense of fulfillment as you undertake new challenges. Stay tuned for valuable insights and tips, and get ready to transform your space! Feeling inspired? Engage with your community and share your progress on social media using the hashtag #DIYHomeImprovement. Together, we can create stunning spaces one project at a time!

Add Row
Add Element
cropper
update
Ultimate Home DIY
cropper
update

We provide the most up to date renovation and repair information for homeowners and DIY enthuastists.

  • update
  • update
  • update
  • update
  • update
  • update
  • update
Add Element

COMPANY

  • Privacy Policy
  • Terms of Use
  • Advertise
  • Contact Us
  • Menu 5
  • Menu 6
Add Element

+16479511958

AVAILABLE FROM 8AM - 5PM

City, State

, ,

Add Element

ABOUT US


Add Element

© 2025 CompanyName All Rights Reserved. Address . Contact Us . Terms of Service . Privacy Policy

Terms of Service

Privacy Policy

Core Modal Title

Sorry, no results found

You Might Find These Articles Interesting

T
Please Check Your Email
We Will Be Following Up Shortly
*
*
*