Add Row
Add Element
cropper
update
Ultimate Home DIY
update
Add Element
  • Home
  • Categories
    • Home Hacks
    • Tool Tips
    • Green Living
    • Renovation
    • Fix It
    • Decor Dreams
    • Skill School
Add Row
Add Element
March 21.2025
3 Minutes Read

Revitalize Your Shower: How to Clean Shower Head Easily

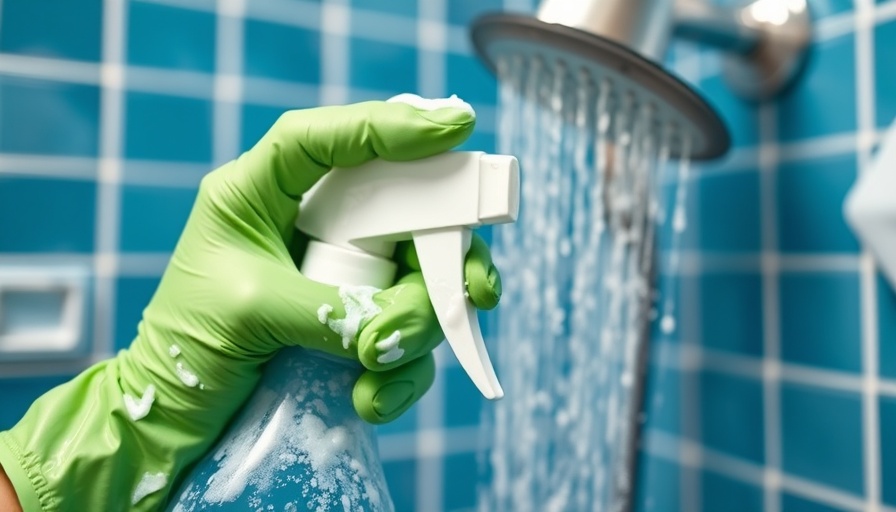
Person cleaning shower head with spray, wearing gloves, how to clean shower head.

Why Cleaning Your Shower Head is Essential

As a homeowner, maintaining your household fixtures is crucial for both function and aesthetics. If you've noticed diminished water flow from your shower head, it’s likely due to mineral buildup or mold. Regular cleaning can prevent this issue, ensuring your bath becomes a refreshing escape rather than a frustrating experience.

Cleaning your shower head doesn’t need to be a daunting task; in fact, with just a few simple tools and a little patience, you can restore its performance significantly. Cleaning your shower head every six months, or more frequently if you live in a hard water area, is a practice that pays dividends in effective water flow and hygiene.

The Tools You Need for Success

To accomplish this task, you will need:

  • Pitcher
  • Baking soda
  • 4 cups of white vinegar
  • Toothpick or paper clip
  • Cleaning cloth
  • Gallon-size plastic bag
  • Rubber bands
  • Lockable pliers or wrench
  • Needle-nose pliers

These items make it simple to tackle the buildup that may be causing blockage; it’s about using what you already have effectively!

Step-by-Step Guide to Clean Your Shower Head

Let’s break down the cleaning process into manageable steps:

Step 1: Inspect and Prepare

Before you dive into cleaning, inspect your shower head for any visible buildup or mold. Understanding the material and construction of your fixture is vital; some materials may require gentler care to avoid damage.

Step 2: Soak in Vinegar

The easiest and most effective way to clean a shower head is to soak it in vinegar. Fill a plastic bag with vinegar, attach it to the shower head using rubber bands, and leave it for at least an hour. The acid in vinegar breaks down mineral deposits effortlessly.

Step 3: Rinse Thoroughly

Once the hour is up, remove the bag. Rinse the shower head under fresh water, using a soft cloth to wipe away any remaining residue. This will help clear out any leftover particles that may linger.

Step 4: Address Residual Blockages

If water flow is still restricted, use a toothpick or paper clip to gently clear each nozzle. Take care not to damage the nozzles; they are crucial for an even water flow!

Step 5: Reconnect and Check

After cleaning, it’s time to reconnect your shower head. Ensure it is securely fastened, then turn on the water to check if the flow has improved. A clean shower head not only works better but also contributes to a healthier bathing environment!

Common Misconceptions About Shower Head Cleaning

Many homeowners hesitate to clean their shower heads, fearing it will be complicated or time-consuming. However, as outlined, following these simple steps can lead to a noticeable improvement in water flow without requiring professional help. Often, the fear of damaging the fixture holds people back, yet the right techniques can preserve and even extend the life of the shower head.

Potential Long-Term Benefits

Investment in regular cleaning not only boosts your daily shower experience but also protects your plumbing. Over time, neglecting to clean can lead to costly repairs if mineral deposits impair your plumbing system. Think of it as a preventative measure that pays off significantly.

Conclusion: Take Action for Better Hygiene

Incorporating shower head cleaning into your home maintenance routine is a proactive step towards a healthier living environment. Don’t overlook this essential task; not only will you enjoy better showers, but you’ll also protect your home appliances in the long run. Start your deep cleaning journey today!

Skill School

2 Views

0 Comments

Write A Comment

*
*
Related Posts All Posts
07.15.2025

Revitalize Your Home: Mastering How to Regrout Tile in 8 Simple Steps

Update Transform Your Space: The Value of Regrouting Your Tiles Are your tile floors looking worn and outdated? The state of your grout can significantly impact the appearance of your tiles and the overall feel of your space. Regrouting is an affordable and effective way to breathe new life into tired floors without the hassle of a full renovation. Not only does this DIY project enhance the aesthetics of your home, but it also plays a crucial role in maintaining the integrity of your tiles, ensuring they last longer and remain safe from moisture damage. Gathering Your Essential Tools and Materials Before diving into the regrouting process, it’s crucial to have the right tools on hand. You'll need a grout mix, tile sealant, an oscillating tool, a cloth, tape, a bucket, a trowel, a knife, cleaner, a toothbrush, sponge, a grout float, and a tile finishing tool. Securing these items will streamline the process and help you achieve professional-looking results. A Step-by-Step Guide to Regrouting Let's delve into the eight easy steps that will have your tiles looking brand new in no time. Here’s how to effectively regrout your tiles: 1. Clean the Grout Lines Start by thoroughly cleaning the grout lines to eliminate any dirt or fungus. A bleach solution works well for this task; just ensure it’s safe for your tiles. Apply the bleach and scrub with a toothbrush, rinsing thoroughly afterward. 2. Remove the Old Grout Using an oscillating tool, carefully remove the old grout between the tiles. It's a meticulous job that requires patience—take your time to ensure you do not damage the tiles in the process. 3. Vacuum the Surface Thoroughly After removing the old grout, vacuum the area diligently to clear out any residues. This prepares the surface for the new grout. 4. Prep with Tile Sealant Apply a tile sealant over the exposed surface to create a barrier against moisture and mildew, promoting a healthier home environment. 5. Apply the New Grout With a grout float, spread the new grout into the gap between the tiles evenly. Ensure it fills all spaces without excess on the surface of your tiles. 6. Clean Excess Grout After applying the grout, use a damp sponge to wipe off any excess. This step is critical in ensuring your tiles remain clean and flawless. 7. Let it Cure Allow the grout to set for at least 24 hours. This waiting period is essential for ensuring long-lasting results and preventing future crumbling. 8. Seal the Grout Once the grout is set, apply a grout sealer to protect against stains and moisture. This extra step ensures your efforts last longer and your tiles remain beautiful. Why DIY? The Benefits of Regrouting Many homeowners hesitate to took on home improvement projects, fearing they lack the skills or tools necessary. However, regrouting is a manageable DIY task. Not only does it save money, but it also gives you a gratifying sense of accomplishment. A fresh grout job can dramatically increase the value of your home, making it a smart investment in your property. Common Misconceptions About Regrouting A common misconception is that regrouting is too complicated or requires specialized knowledge. In reality, with careful preparation and following a guided approach, regrouting can be a straightforward task. The transformation is often more dramatic than anticipated, truly changing the ambiance of your living space. Inspiration: Bringing New Life to Your Home As you embark on this regrouting project, think of it not just as maintenance but as an opportunity for rejuvenation. A freshly grouted floor can create a clean, welcoming atmosphere that enhances your home’s charm and comfort. Don't let worn-out grout diminish your home's beauty. With determination and the right tools, you can achieve stunning results that make your floors shine again. Whether you're an experienced DIY-er or a first-timer, regrouting your tiles is a step towards a more vibrant home. Are you ready to dive in?

07.10.2025

Transform Your Space: The Ultimate DIY Guide to Peel and Stick Tile Installation

Update Unveiling the Simplicity of Peel and Stick Tile Installation Homeowners eager to transform their rooms without the hassle of professional help will find peel and stick tiles to be a game-changer. This innovative flooring solution combines ease of use with stylish appeal, letting you take charge of your home improvement projects. Armed with just a few basic tools and a bit of preparation, the journey from old flooring to a fresh, new look can be completed in just a few hours. Essential Preparation Before Installation Before diving into tile installation, it is crucial to prepare your workspace diligently. Start by removing any old baseboards, ensuring a clean area devoid of detritus that can interfere with adhesion. Eliminate any uneven surfaces by sweeping thoroughly and, if necessary, applying a latex primer to the existing floor to enhance the stickiness of your new tiles. Gathering Your Tools: What You Need The installation process requires various tools to ensure a smooth workflow. Essential items include: Pair of nippers Putty knife Pry bar Dustpan Dust mask Eye protection goggles Stiff-bristled broom Vacuum cleaner Chalk lines Utility knife Rollers These tools will help facilitate a seamless installation process, making it easier for you to achieve that polished look. Calculating the Exact Amount of Flooring Needed One critical step is measuring the space you wish to cover. Begin by measuring the length and width of the room in feet and multiply these numbers for the total square footage. To avoid running short, it’s wise to purchase an extra 10% more than the calculated total. For instance: Length x Width = Total sq. ft.Total sq. ft. + (Total sq. ft. x .10) = Amount of tiles to buy This calculation helps ensure you have enough material for installation, cuts, and future repairs. Installation Steps: A Simple Breakdown Installing peel and stick tiles might seem daunting, but it’s easier than it appears! Follow these steps for a successful installation: Start with the Surface: Ensure your floor is clean and dry. This includes pulling out baseboards and ensuring all nails or debris are removed. Mark Your Line: Using the chalk lines, mark where your first tile will start. This is crucial for alignment. Begin Laying Tiles: Start from your marked line, peel off the backing, and place the tile down, applying pressure initially to keep it secure. Finish Up: After laying all the tiles, consider using a vinyl roller to ensure every piece is firmly in place. It’s generally the last touch that makes a big difference! The Importance of Grouting While grouting isn't always necessary, it can enhance the overall appearance of your newly installed tiles. For areas that will experience heavy foot traffic or moisture, consider applying grout for added durability and aesthetic appeal. Common Mistakes to Avoid Even a straightforward process like installing peel and stick tiles can come with pitfalls. Here are a few common mistakes to steer clear of: Skimping on Measurements: Not measuring twice can lead to serious complications, so make sure to be precise! Rushing the Preparation: Skipping cleaning or surface preparation can lead to poor adhesion and tiles lifting over time. Ignoring Acclimatization: Don’t forget to let your tiles sit in the room where they will be installed for a few hours beforehand. This helps avoid expansion or contraction once installed. Your DIY Project Awaits! Taking on this DIY project not only elevates the aesthetic of your home but also instills a sense of accomplishment. The satisfaction derived from laying your own tiles is unparalleled. Plus, with the right tools in hand and a clear plan laid out, you will find that transforming your living space can be both fun and rewarding. Ready to bring your flooring vision to life? Gather your materials, follow the installation steps, and showcase your stunning new room!

07.09.2025

Discover the Surprising Health Benefits of Dry Saunas for Homeowners

Update Unlocking the Health Benefits: Why You Should Sweat it Out in a Dry Sauna Are you looking for a simple yet effective way to boost your health and well-being? A dry sauna, often found in gyms or spas, offers not just relaxation but a wealth of health benefits that can enhance your lifestyle. The Science Behind Saunas: How They Work A dry sauna operates at high temperatures—up to 195 degrees Fahrenheit—drying the air within the enclosed space and promoting profuse sweating. The extreme heat invigorates your body, increasing your heart rate and enhancing circulation. This process not only sweats out impurities but also taps into your body’s natural healing mechanisms. Boost Your Immune System: A Natural Defense One of the standout benefits of regular sauna use is its positive impact on the immune system. Research indicates that frequent sauna bathing can elevate levels of white blood cells, which play a vital role in combating infections. The heat encourages improved circulation, allowing immune-boosting proteins to reach areas of need throughout your body, thus enhancing your overall resilience during cold and flu season. Weight Loss Aid: An Unconventional Strategy While physical exercise and a healthy diet are essential for weight loss, incorporating sauna sessions post-workout can amplify your results. The increased heart rate from the sauna mimics the effects of aerobic exercise, resulting in calorie burn even while you’re sitting still. This post-exercise protocol can accelerate fluid loss and help kickstart your weight-loss journey effectively. Skin Health: The Glow-Up You’ve Been Looking For Using a dry sauna can significantly enhance your skin health. The intense heat opens up pores, allowing for deep cleansing and the removal of toxins. With routine sauna sessions, you can promote increased blood flow to the skin, leading to a healthy, radiant complexion. Stress Relief: The Mental Advantage In our fast-paced lives, stress reduction is crucial. The tranquil environment of a sauna, combined with the heat, helps to relax your muscles and release the tension in your body. Additionally, it stimulates the production of serotonin, the body's feel-good hormone, promoting overall mental well-being and reducing anxiety. Promoting Heart Health: A Steady Beat Regular sauna use has been linked to better heart health. Studies reveal that saunas can improve cardiovascular function and lower blood pressure over time. The intense heat causes your heart to work harder—similar to moderate exercise—strengthening your cardio system and reducing the risk of heart disease. Detoxification: Sweat Away Toxins The act of sweating helps to purge the body of toxins, leading to enhanced overall health. Daily exposure to the sauna can improve metabolic processes, facilitate detoxification, and support liver functions, making it an excellent addition to an all-natural lifestyle. Final Thoughts: Embrace the Dry Sauna Benefits Incorporating sauna sessions into your routine can unlock numerous health benefits, from boosted immunity to glowing skin. For homeowners interested in DIY health improvements, employing a sauna is a unique approach to combining self-care with personal well-being. Make time for yourself and enjoy the earthy heat of a dry sauna. Interested in installing a sauna at home? Explore local home improvement resources for DIY sauna kits and installation tips!

Add Row
Add Element
cropper
update
Ultimate Home DIY
cropper
update

We provide the most up to date renovation and repair information for homeowners and DIY enthuastists.

  • update
  • update
  • update
  • update
  • update
  • update
  • update
Add Element

COMPANY

  • Privacy Policy
  • Terms of Use
  • Advertise
  • Contact Us
  • Menu 5
  • Menu 6
Add Element

+16479511958

AVAILABLE FROM 8AM - 5PM

City, State

, ,

Add Element

ABOUT US


Add Element

© 2025 CompanyName All Rights Reserved. Address . Contact Us . Terms of Service . Privacy Policy

Terms of Service

Privacy Policy

Core Modal Title

Sorry, no results found

You Might Find These Articles Interesting

T
Please Check Your Email
We Will Be Following Up Shortly
*
*
*