Add Row
Add Element
cropper
update
Ultimate Home DIY
update
Add Element
  • Home
  • Categories
    • Home Hacks
    • Tool Tips
    • Green Living
    • Renovation
    • Fix It
    • Decor Dreams
    • Skill School
April 30.2025
3 Minutes Read

Mastering Bubble Wrap Safety: Popping the Myths for Your Move

Clear bubble wrap sheet unrolled on a dark background.

Why Bubble Wrap Matters in Your Moving Process

When it comes to moving or protecting fragile items, bubble wrap reigns supreme in the arsenal of packing materials. Its unique design not only provides exceptional cushioning but also serves practical purposes during the moving process. If you're a homeowner planning a DIY project or renovation, understanding how to effectively use bubble wrap can prevent potential disasters involving your cherished possessions.

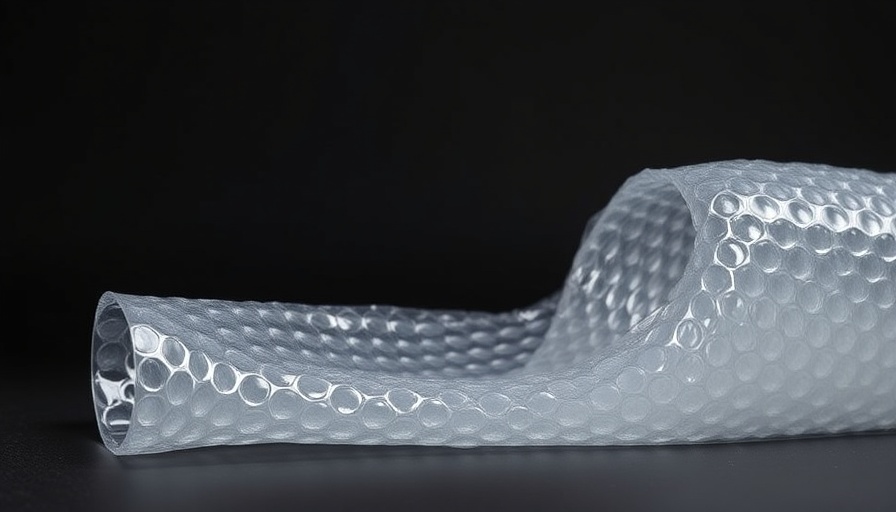
Understanding the Construction of Bubble Wrap

Have you ever stopped to think about the ingenious design of bubble wrap? Made from polyethylene, it consists of two primary sheets: one with bubbles and one flat layer. This construction isn't just for looks—according to moving expert Ross Sapir, the bubbles are formed on one side while the flat side stabilizes and seals them. It’s crucial to know that the flat side is not just a mere afterthought; it’s designed to withstand stacking and pressure while maintaining the integrity of your wrapped items.

The Importance of Bubble Placement

One common misconception among homeowners is that any side of the bubble wrap will do for packing items. However, Sapir emphasizes the significance of facing the bubbly side toward the object being wrapped. This helps to maximize cushioning, absorb shocks, and prevent delicate items from hitting hard surfaces. With shifting, bumps, and vibrations during transport, proper placement can be a game-changer in avoiding damage.

A Step-by-Step Guide on How to Bubble Wrap Like a Pro

Grabbing any roll of bubble wrap might seem like an effortless task, but technique is key. Here's a comprehensive step-by-step guide:

  1. Lay the bubble wrap on a flat surface with the bubble side facing up.
  2. Place the item you're wrapping in the center of the sheet.
  3. Encapsulate the item entirely, making sure the bubbles contact it snugly.
  4. Use packing tape to secure the wrap, ensuring a tight fit.
  5. For particularly fragile items, consider double-wrapping for extra security.
  6. Lastly, place the wrapped item in a sturdy box with added cushioning, like packing peanuts, to prevent any shifting during the move.

Common Mistakes to Avoid When Using Bubble Wrap

It’s all too easy to make mistakes, especially when trying to protect your valuables. One of the biggest missteps? Using the wrong side! Individuals often mistakenly wrap objects with the flat side facing inward, compromising the protective barrier that the bubbles provide. Additionally, failing to secure the bubble wrap properly can result in unintended damages. Always check your wrap before loading items into boxes!

Frequently Asked Questions About Bubble Wrap

As you delve into the world of bubble wrap, you might have some burning questions:

  • Is bubble wrap recyclable? Yes, many recycling programs accept bubble wrap, but be sure to check local guidelines!
  • Can bubble wrap be used for non-fragile items? While it primarily provides protection, it provides a cushioned barrier for all kinds of items during transport.
  • What makes bubble wrap better than other packing materials? The air-filled bubbles provide unique shock absorption that cardboard or foam may not offer.

Conclusion: Proper Use of Bubble Wrap Can Save You Hassle

In summary, understanding the importance of using bubble wrap correctly can save you from heartache and loss when managing your beloved items. Whether it’s a delicate vase or valuable electronics, the right wrapping technique ensures your belongings are protected against damage during the moving process. So, the next time you tackle a home project or relocation, make sure to implement these expert tips on properly using bubble wrap!

Take action and gather your bubble wrap! The protection of your precious belongings starts with the right technique. Happy packing!

Home Hacks

4 Views

0 Comments

Write A Comment

*
*
Related Posts All Posts
12.13.2025

Master the Skill of Splitting Wood Safely with an Axe: Essential Tips

Update Unlocking the Art of Wood Splitting: Your Guide to Safe TechniquesWood splitting is not merely a chore; it's a rewarding skill rooted in both tradition and practicality. For homeowners keen on tackling DIY projects, splitting your own firewood can save money and provide a fulfilling physical activity. But there's an art to it, and like any craft, mastering it requires understanding and practice. In this article, we will delve into the essential techniques and safety measures for splitting wood with an axe, ensuring you can work effectively while minimizing risk.Why Safety is ParamountBefore you even pick up an axe, it's crucial to acknowledge the potential hazards associated with wood splitting. The most common injuries occur to the hands and feet, making protective gear indispensable. Always use safety glasses, a full-face shield when necessary, and sturdy gloves to help grip the axe and prevent injuries. Firm work boots with safety toes are also a must to safeguard your feet should an accident occur.Moreover, a general rule of thumb is to have a friend nearby when performing this activity. Not only does it provide an extra set of eyes for safety, but it’s also a good way to share in the satisfying experience of a job well done!Choosing the Right Axe: The Foundation of Effective SplittingThe success of your wood splitting largely hinges on selecting the right axe. A beginner shouldTypically, a good axe handle should reach from the ground to your hip; this size helps with control and leverage. A lighter axe may be preferable for smaller logs, while larger, tougher logs will require a splitting maul. Remember, the maul's heftier design is meant to drive through wood using more momentum than sharpness. Additionally, always ensure that your axe blade is sharp. A well-maintained axe helps in achieving a clean split with minimal effort, whereas a dull axe can bounce off wood, leading to accidents. So, take the time to sharpen your tool as needed!The Importance of Proper PositioningPositioning the wood correctly is often overlooked but is vital for safe and effective splitting. Use a sturdy and flat chopping block—typically a large log placed in an open area. This not only gives the axe a place to land but also minimizes the chance of aiming incorrectly and injuring yourself. Before making your split, take note of the grain pattern; aim to split along, rather than across, the grain to achieve the best results. Avoid knots and choose dry logs whenever possible, as they split more easily than those with high moisture content.Nailing the Grip: How to Hold an Axe SafelyLearning how to hold the axe properly is an important next step. Your leading hand—typically your dominant hand—should grip the axe handle close to the ax head, while your other hand should be around the end of the handle. This grip allows you to control the swing and direct the force accurately. As you practice your swing, remember to lift thoroughly before driving down to split the wood. Watch your stance; position yourself with a stable footing and be aware of your surroundings at all times.Mindfulness Matters: Understanding the ProcessEngaging in the act of wood splitting offers not just the practical benefit of fuel for your fireplace, but it’s also a great way to engage with nature and reconnect with the outdoors. It transforms a simple task into an act of mindfulness, sustaining both physical activity and mental focus.The Health Benefits: More Than Just Splitting WoodAs you immerse yourself in wood splitting, you're not only building physical strength but also endurance and coordination. Each swing tones your arms and builds core strength, which is beneficial to your overall fitness. Moreover, outdoor activities like this have been linked to improved mental health, as they can reduce stress and increase feelings of well-being. The combination of focusing on a task while soaking in natural surroundings is an excellent recipe for holistic health.Practical Tips for the Aspiring Wood SplitterTo further empower you, here are a few practical tips: always keep your axe sharp, position your logs strategically, and wear your protective gear. Breaking your work into small chunks can make the task feel more manageable, and maintaining a steady rhythm while splitting can prevent fatigue and enhance your efficiency.Conclusion: Embrace the Skill and Reap the RewardsUnderstanding how to split wood safely not only makes you a more competent DIYer but can also provide a connection to both community and nature. So grab an axe, follow these guidelines, and prepare for your next outdoor project with confidence!With these insights, you'll find that splitting wood is not just about preparing for colder months; it’s a rewarding practice that sharpens both your skills and your physical fitness. So get out there, and split some wood!

12.13.2025

Unlock Space and Unwrap Joy: Your Ultimate Pre-Christmas Decluttering Guide

Update Declutter Your Space This Holiday Season for More Joy The festive season is synonymous with joy, gatherings, and generosity. Yet, amidst the carols and cheer, many homeowners face a common challenge: clutter. The run-up to Christmas often brings with it a surge in belongings—be it gifts, decorations, or the everyday items that just keep piling up. In today’s fast-paced world, efficient storage isn't just a convenience; it’s a necessity for creating a warm and inviting home this holiday season. Transform Your Home: The Importance of Pre-Christmas Decluttering Clearing out your home before the holiday rush is more than just a cleanliness project. It’s an investment in peace of mind and the overall experience of the festive season. The pre-Christmas decluttering process is akin to finding a breath of fresh air before the festivities, allowing you to make your space welcoming and comfortable. As you embark on this organizational journey, think about it as a chance to enhance your mental and emotional state, making room for joy, memories, and new traditions. A Room-by-Room Action Plan for Holiday Readiness You don't need to tackle your entire house at once. Instead, focus on key areas that will see significant holiday activity. Your Garage: A Holiday Command Center Often a clutter catch-all, the garage can be transformed into a functional staging area. Begin by sorting through holiday decorations, donating items that no longer serve you. Heavy-duty shelving can help maximize vertical space while keeping your tools and decorations organized. Create specific zones for ornament boxes, light strings, wrapping supplies, and even a section for beverages. When everything has its place, preparing for gatherings becomes a breeze. Entryways and Guest Areas: A Warm Welcome As guests arrive, a clear entryway sets a welcoming tone. Using a movable garment rack can help manage the influx of coats and bags. Inside closets, an adjustable clothes hanging rack effectively doubles your space, ensuring guests have room for their belongings. Don’t forget to declutter any seasonal items to make way for holiday cheer. Living Spaces: Keeping the Joy Front and Center Living spaces are where memories will be made, so it's essential to create a warm and inviting atmosphere. Dedicate time to declutter the living room of any non-festive decor, making space for holiday decorations and gift displays. Consider repurposing shelves to store items that are used less frequently during the season. Managing Your Kitchen: Space for Holiday Feasts The kitchen is the heart of your home, especially during the holidays. Clear out any expired or unwanted foods from your pantry to make room for seasonal items. Ensure your refrigerator and freezer are organized and ready for pre-cooking holiday favorites. This effort will save you time, stress, and create efficiency as you prepare for gatherings. Your Pre-Holiday Checklist: 7 Essential Decluttering Rules Clear the Pantry: Remove expired items and make room for holiday groceries. Organize the Refrigerator: Clear out older items to prepare for holiday cooking. Prepare Guest Areas: Ensure rooms are welcoming and clutter-free. Reassess Decorations: Donate or toss decorations that don't fit your current style. Declutter Entryways: Keep the space clear for guests' belongings. Living Spaces: Create cozy, open environments conducive for socializing. Implement the 20-Minute Rule: Tackle small spaces in short bursts to effectively manage clutter. Setting the Stage for Holiday Joy The festive season should be a time for celebrating and creating beautiful memories. A decluttered, organized home allows you to focus on what truly matters—sharing joy with loved ones. By incorporating these practical decluttering tips, you'll not only enjoy a smoother holiday experience but also set a positive tone for the New Year ahead. As you take these steps, remember that revitalizing your space fosters an environment that invites joy and comfort during the holidays. When everything has its rightful place, you can focus on what truly matters—creating cherished memories with family and friends.

12.12.2025

Discover Why the Saatva Graphite Mattress Topper Is Essential for Your Home

Update Unveiling the Top Bedding Solution: Saatva Graphite Mattress TopperFor homeowners struggling with themed sleep discomfort or chronic back pain, the search for a budget-friendly upgrade can feel overwhelming. Yet, a revelation has come forth in mattress technology: the Saatva Graphite Memory Foam Mattress Topper. Having topped the charts as the best bedding item of 2025 in various reviews, including those from renowned sources like Family Handyman and Forbes, this innovative topper not only adds luxurious comfort but also significantly alleviates pain.A Sleep Game-Changer for All Types of SleepersMary Hen, a dedicated tester and reviewer, documented her struggles with back pain exacerbated by her firm mattress after childbirth. Upon integrating the Saatva Graphite topper into her sleeping arrangement, she witnessed a transformative experience that could resonate with many. The three-inch plush memory foam incorporated with cooling graphite technology not only aids in regulating temperature but contours to the body, providing targeted pressure relief that eases tension in critical areas.The Saatva topper’s design is meant to breathe life into older mattresses without the hefty price tag of a new bed. For homeowners hesitant about making a significant financial investment, this provides a compelling reason to consider the addition of a quality topper as an interim solution while maintaining comfort.How Mattresses Influence Sleep QualityUnderstanding the impact of mattress quality on sleep health is essential. The right mattress—or topper—can drastically shift sleeper experiences from discomfort to restful sleep. As noted in reference articles from both Family Handyman and Forbes, an inadequate sleep surface not only results in poor sleep but can intensify existing pain conditions. This is particularly prevalent in back pain cases, which can be aggravated by unsupportive surfaces. Thus, the Saatva Graphite Topper is designed to mitigate these issues, supporting spinal alignment while providing the plush surface needed for a soothing night’s sleep.Backing Evidence: Leading-Edge Testing and ExperienceWhat solidifies the Saatva topper's position at the forefront of bedding essentials are the rigorous tests it has undergone. Experts from both Family Handyman and Forbes highlight its adaptability to various body types and sleep styles, confirming its reputation as a top choice for back pain alleviation. Additionally, its durable design withstands wear and tear, assuring longevity, making it an investment that pays back in comfort strides.Common Misunderstandings About Mattress Toppers“Are mattress toppers only for old mattresses?” may be a common misconception. The reality is that they can be a strategic enhancement regardless of mattress age, providing customized comfort levels and allowing homeowners to achieve their desired firmness. As referenced in the analysis provided by Forbes, a proper layer can correct imbalances caused by poor foundation. Therefore, the Saatva topper stands not just as a filler but as an essential layer that promotes healthy sleep.Practical Insights for Your Bedding ChoiceWhen considering the Saatva Graphite Mattress Topper, evaluate your personal sleep needs. Would you classify yourself as a back, side, or stomach sleeper? Identifying your sleep style can guide you in maximizing the effectiveness of this topper. Side sleepers, for instance, may find the pressure relief features particularly advantageous, whereas back and stomach sleepers can choose to target their specific alignment needs.Conclusion: Elevate Your Sleep TonightIf you find yourself waking up sore or groggy, the Saatva Graphite Memory Foam Mattress Topper may just be the solution you've been looking for. Invest in your comfort and overall health with this simple yet effective upgrade to your existing mattress. Don’t let sleep discomfort persist. Consider enhancing your nights with the Saatva topper and embrace a rewarding and revitalizing sleep experience.

Terms of Service

Privacy Policy

Core Modal Title

Sorry, no results found

You Might Find These Articles Interesting

T
Please Check Your Email
We Will Be Following Up Shortly
*
*
*