Add Row
Add Element
cropper
update
Ultimate Home DIY
update
Add Element
  • Home
  • Categories
    • Home Hacks
    • Tool Tips
    • Green Living
    • Renovation
    • Fix It
    • Decor Dreams
    • Skill School
Add Row
Add Element
March 20.2025
3 Minutes Read

DIY Shower Pan: Step-by-Step Guide for Homeowners

DIY shower pan construction with mesh and drain installation.

Why Building Your Own Shower Pan Makes Sense

For homeowners diving into DIY projects, creating your own shower pan can be both a fulfilling challenge and a practical decision. While factory-made units often come with a hefty price tag, custom-shaping your shower pan allows for personal flair and uniqueness in your designs. Whether you’re planning a serene spa retreat or a vibrant family bathroom, crafting your own pan tailors perfectly to your specifications, enhancing both aesthetics and functionality.

The Essential Elements of a Durable Shower Pan

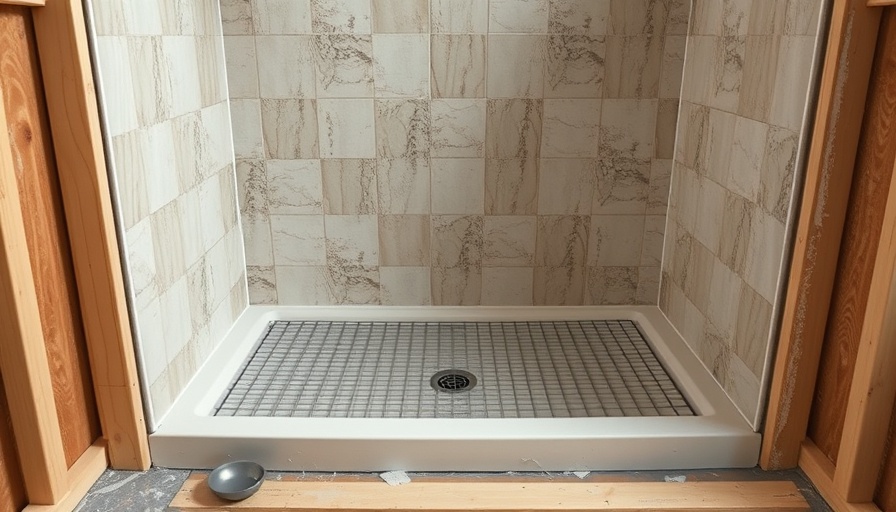
A shower pan serves as the foundation of your shower, directing water flow to the drain while providing a comfortable and safe surface for standing. Understanding the anatomy of a shower pan is crucial; most individuals will encounter two fundamental types: pre-fabricated and custom-built. Pre-fabricated pans are popular due to their simplicity, but constructing a custom one not only offers creativity but also ensures a better fit for your unique space.

Steps to Crafting a Shower Pan from Scratch

1. **Gather Your Tools and Materials**: To start, collect essential tools like a circular saw, measuring tape, mortar, tiles, and the shower liner. Having everything at hand makes the process smoother.

2. **Measure and Frame**: Before building, accurate measurements are critical. Ensure you measure the space between wall studs, taking care to leave room for the curb, which is essential for accessibility. Use 2x6 boards to frame your shower pan.

3. **Constructing the Pre-Slope**: Begin by laying tar paper to protect your subfloor from moisture. Follow this by creating a pre-slope layer using mortar. This step is essential in ensuring optimal drainage.

4. **Waterproofing**: After the pre-slope, add a water-resistant shower pan liner. This can be made from PVC or similar materials, providing a buffer against water damage.

5. **Top Slope and Tiling**: Finish with a top slope layer before laying tiles. This is where your design choices truly come to life, with options ranging from vibrant mosaic patterns to sleek, modern tiles.

Design Considerations for Your Shower Pan

Visual appeal is just as important as functionality. When choosing tiles, opt for slip-resistant varieties that lend themselves well to bathroom environments. You can also incorporate different textures and colors to match your overall bathroom decor.

Common Mistakes to Avoid When Building a Shower Pan

While creating your own shower pan is rewarding, novice DIYers often make a few common blunders:

  • Overlooking Drainage: The primary aim of a shower pan is effective drainage. A sloped mortar base ensures that water flows towards the drain and not off to the sides.
  • Poor Waterproofing: Ensure that the liner is installed correctly, as any gaps can lead to costly water damage down the line.
  • Neglecting Tile Selection: Choose tiles not only for look but also for safety; slippery tiles can pose a risk, particularly for families with children or elderly members.

Future Implications of DIY Shower Pans

Embracing DIY skills like shower pan construction has larger implications than just aesthetic upgrades. It promotes self-sufficiency and fosters a connection with your living space. The confidence gained from completing such a project can inspire further renovations, potentially increasing your home's value and personalization.

Conclusion: Embrace the Challenge

Building a shower pan may seem daunting, but with the right information and tools in hand, it transforms into a manageable project. Not only will you enjoy a custom-designed element in your home, but the experience will empower your DIY journey. So gather your materials, roll up your sleeves, and let your creativity flow into your next home project!

Ready to create your own shower pan? Start today with the tips shared here, and turn your bathroom into a beautiful and functional oasis!

Skill School

4 Views

0 Comments

Write A Comment

*
*
Related Posts All Posts
03.26.2025

How to Clean and Shine Engineered Hardwood Floors for Lasting Beauty

Update Unveiling the Charm of Engineered Hardwood Floors Engineered hardwood floors have gained immense popularity among homeowners due to their durability and aesthetic appeal, outclassing traditional hardwood in many aspects. However, while they enhance the beauty of our homes, these floors also require a thoughtful approach to cleaning and maintenance to preserve their charm. Essential Tools for a Gleaming Finish Before diving into the cleaning process, having the right tools on hand is essential. Here’s what you’ll need: A vacuum cleaner or sweeper Warm water Vinegar A specially formulated floor cleaner Sanding equipment for minor repairs With your toolbox filled, let’s explore how to clean and shine engineered hardwood floors effectively. Step-by-Step Guide to Cleaning Your Floors Taking care of your engineered hardwood floors doesn’t have to be a backbreaking task. Implementing a regular cleaning routine will keep your floor shiny and inviting. Here’s how: 1. Ideal Vacuuming Practices A quality vacuum cleaner is your best ally in picking up dust and dirt. It’s crucial to choose a vacuum designed specifically for hardwood surfaces, as traditional beater bar vacuums can scratch the finish. Avoid steam mops, as the high humidity can damage engineered wood. Instead, aim to vacuum regularly to prevent dust from settling into your floors. 2. Create a Natural Cleaning Solution Nothing beats a good DIY cleaning solution! Combine equal parts of warm water and vinegar in a spray bottle and spritz the mixture directly onto your floor. Use a mop to spread it across the surface, ensuring not to saturate the wood. This inexpensive solution neutralizes odors and shines floors naturally without harmful chemicals. 3. Choose the Right Commercial Cleaner If you prefer store-bought solutions, it’s vital to select cleaners specially formulated for engineered hardwood floors. Stay away from harsh products that could harm the flooring's finish. Always perform a patch test in a discreet area before applying any new product widely, ensuring it won’t cause discoloration or damage. 4. Protect High-Traffic Areas To keep your floors looking their best, consider placing area rugs at entry points and high-traffic spaces. A well-chosen rug not only adds style but also acts as a barrier, preventing dirt and scratches. Look for options that complement your decor; they can beautifully enhance your home while providing protection. 5. Resand and Refinish When Necessary Even with diligent cleaning, wear and tear can occur. If furniture has scratched the surface, sanding and refinishing are effective solutions. Regularly check for damage and schedule a refinishing routine every few years to keep your floors looking as good as new. The Emotional Value of Well-Maintained Floors A clean and shiny floor instills a sense of pride and accomplishment in any homeowner. Whether you're hosting friends or enjoying a quiet evening at home, your engineered hardwood floors set the stage for those moments. Maintaining their shine enhances both the aesthetic and emotional value of your space. Current Trends in Floor Care As homeowners become increasingly invested in sustainable living, choosing eco-friendly cleaning products has become a trend. Many floor care companies now offer biodegradable cleaner options that are safe for both your flooring and the environment. Investing in these products aligns with a healthier planet and more sustainable home. Conclusion: Shine On! Maintaining the beauty and shine of your engineered hardwood floors is within your reach. By following these simple yet effective cleaning tips, you can create a welcoming atmosphere in your home for years to come. Make it a habit to clean regularly and take your time with the special treatments to enjoy the vibrant elegance of your floors. Feeling inspired? Start your cleaning journey today by gathering your tools and trying out these tips to refresh your living space. The beauty of your home is only a clean floor away!

03.25.2025

Discover How to Remove Window Screens Like a Pro: A Step-by-Step Guide

Update Mastering the Art of Removing Window Screens: A Complete GuideIf you're a homeowner looking for a straightforward yet informative guide to removing window screens, you've come to the right place! Whether for repairs, replacements, or just a seasonal cleaning, knowing how to effectively take down your window screens can make a world of difference in maintaining your living space. This guide will empower you with the necessary skills and understanding to handle this task safely and efficiently.Understanding Your Window Screen TypesBefore diving into techniques, it's essential to familiarize yourself with the different types of window screens. Screens come in various designs and installation methods, which can influence how you remove them. Here’s a brief overview:Interior Window Screens: Normally installed from the inside, these screens offer aesthetic benefits and can be easily accessed during maintenance.Exterior Window Screens: These are fitted outside and may require special techniques due to their installation method.Essential Tools for the JobPreparation is key! Ensure you have the following tools handy:Screwdriver: Useful for removing any screws that may secure the screen frame.Utility Knife: If you need to cut away any existing spline or sealants.Gentle Pry Tool: Helpful for dislodging screens without damaging the frame.Step-by-Step Guide on Screen RemovalNow, let’s begin the step-by-step process of removing your window screens:Open the Window: Start by fully opening your window to allow access to the screen.Locate Remove Tabs/Dowels: Search for any tabs or dowels securing the screen to the frame. These are often found on the sides of the screen. Pull them out gently.Pull Out the Screen: Lift the screen slightly and angle it to remove it from the frame. If your screens use pins, remember to take those out carefully.Store Carefully: Lay your screen down flat in a safe area to prevent damage during repairs or replacements.Addressing Common Issues in Screen RemovalEvery DIY enthusiast knows that surprises often arise. Here are some common issues you might face:Stuck Screens: If a screen doesn’t budge, there might be debris or rust. Gently pry it out with your tool.Bent Frames: Inspect the frame carefully and use a level to fix it before attempting to re-install the screen.Cleaning and Maintenance TipsWhile you have your screens out, this is the perfect time to give them a cleaning. Use a soft brush and warm, soapy water to wash away dirt. Storing your screens in a dry, flat location ensures they remain in great shape until you are ready to reinstall them.Future Predictions and Seasonal ConsiderationsMoving forward, taking care of your window screens can enhance your home's ventilation and protect against insects. In an era of climate change awareness, also consider using energy-efficient screens that maximize airflow while minimizing dirt entry.Final Thoughts: Take Charge of Your Home Improvement ProjectsUnderstanding how to handle window screens is valuable knowledge for homeowners. This skill can save you time, money, and unnecessary stress. If you follow this guide and take proactive steps to maintain your window screens, your home will not only look beautiful but will also function optimally. Don’t hesitate; grab your tools and get started on this rewarding DIY journey! Want to dive deeper into home improvement? Check our other articles that cover repairs and renovations to turn your home into your dream space!

03.24.2025

Transform Your Basement: 7 Compelling Reasons to Choose Epoxy Flooring

Update The Benefits of Epoxy Flooring in BasementsWhen it comes to enhancing the functionality and aesthetics of your basement, one often overlooked option is epoxy flooring. While many homeowners focus on aesthetics, epoxy's practical benefits cannot be overstated. This article explores some compelling reasons to consider epoxy for your basement flooring.Unmatched Durability: A Long-Term InvestmentBasements are unique areas of the home, often prone to moisture and wear. The durability of epoxy floors stands out; they create a tough, long-lasting surface that can withstand heavy foot traffic and spills. Imagine a flooring solution that can last over a decade with minimal upkeep—epoxy can offer just that. My personal experience echoes this sentiment; after using epoxy in my own basement renovation, I've noticed no cracks or stains over the years. This durability eliminates the need for frequent costly replacements.Effortless Maintenance for Busy HomeownersWith busy lifestyles, homeowners seek low-maintenance solutions for home improvement projects. Epoxy flooring shines here as well. Its smooth surface is resistant to dirt and staining, making cleaning an effortless task. A mop, vacuum, or simple cleaning solution easily removes spills. My anecdote reinforces this; keeping a clean and polished look in my basement has become a breeze. This low-maintenance nature gives you more time to enjoy your space without worrying about upkeep.Moisture Resistance: Protecting Your InvestmentOne of the primary concerns in any basement is moisture. Whether from groundwater or humidity, the potential for damage is high. Epoxy flooring forms a protective waterproof barrier, shielding the underlying concrete from moisture and preventing mold and mildew growth. For homeowners like myself, who have dealt with humidity issues, this feature is a game changer. It provides peace of mind knowing that the floors are safeguarded against the common culprits of basement deterioration.DIY-Friendly Application: Control Your ProjectFor the hands-on homeowner, epoxy flooring application can be an enticing DIY project. While it requires some preparation and technique, the process is straightforward. Much like painting walls, applying epoxy can be a fun endeavor with satisfying results, allowing homeowners to customize their space. If your skills are up to par, this opportunity not only saves money but enables you to take ownership of your home improvement project.Chemical Resistance: A Necessary FeatureFor basements used as laundry rooms or recreational spaces, chemical resistance is essential. Epoxy provides ample resistance against cleaning agents and other potential spills. This characteristic ensures that the vibrant look of the flooring remains intact even after the inevitable messes, providing a robust solution for everyday activities.Psychological Benefits: A Space You Can LoveBeyond mere functionality, the impact of a well-finished basement on mental well-being can't be dismissed. An inviting space can enhance your quality of life—be it a place for leisure or social gatherings. Investing in epoxy flooring not only improves the look of your basement but also fosters a sense of pride and enjoyment in the space you've created.ConclusionYour basement deserves a flooring solution that matches its unique environment. Epoxy flooring stands out for its durability, ease of maintenance, moisture resistance, and aesthetic appeal. Whether you're considering a large renovation or simply looking to spruce up your existing space, the benefits of epoxy make it an excellent investment. The potential to improve your home's functionality and enhance your quality of life makes this option an enticing DIY project.If you're ready to take the plunge on your renovation journey, consider the many advantages of epoxy flooring and explore how it can transform your basement into the beloved space you desire.

Add Row
Add Element
cropper
update
Ultimate Home DIY
cropper
update

We provide the most up to date renovation and repair information for homeowners and DIY enthuastists.

  • update
  • update
  • update
  • update
  • update
  • update
  • update
Add Element

COMPANY

  • Privacy Policy
  • Terms of Use
  • Advertise
  • Contact Us
  • Menu 5
  • Menu 6
Add Element

+16479511958

AVAILABLE FROM 8AM - 5PM

City, State

, ,

Add Element

ABOUT US


Add Element

© 2025 CompanyName All Rights Reserved. Address . Contact Us . Terms of Service . Privacy Policy

Terms of Service

Privacy Policy

Core Modal Title

Sorry, no results found

You Might Find These Articles Interesting

T
Please Check Your Email
We Will Be Following Up Shortly
*
*
*